One month ago right this second, we were falling in love with Stella for the first time. I can’t believe it was only a month ago! Seems like she’s been with us for a lot longer than that. Maybe because we dreamt of her for so long before she was actually here. :)
We spent another weekend with warm February temperatures [read: 66 degrees] working on Stella. We got all of the bottom wall panels removed, which means we are one step closer to raising the body off the frame. While Casey worked on drilling out the rivets so we could remove the wall panels, I helped by vacuuming up all the gunk & grime we’ve been jonesin’ to get cleaned out. Thank goodness for respirators! And overalls. And gloves.
Once we had gotten all of the filth vacuumed and most of the screws picked up, we worked on getting all the insulation out so we could vacuum out the c-channels. The aluminum is so shiny beneath the walls! Now that the floors are all vacuumed up and everything is off the floors in the interior, it is easier to see some of the floor rot we’ve got going on. I only included a couple pictures, but there are 4 or 5 different areas where there are holes in the floor. The worst area, by far, is the rear (picture below right). We’re unsure what the frame looks like, but we are certainly eager to find out. And really, that’s our next big step. Aside from a bunch of rivets to drill out & building the gantries to actually lift the body from the frame, we’re ready to for lift off! Note to self: use as future blog post title.
It is super exciting seeing Stella so empty; it makes it so much easier to dream of the future. She’s just a big blank slate ready for restoration love! And it looks so spacious. The left photo is looking from the front of the Airstream to the back (the living room to the bathroom); the right is the back looking to the front (the bathroom to the living room).
We ended our day of demo drilling out rivets. Shocked? ;) Saturday was especially exciting because we drilled out our first EXTERIOR rivets! To drill out rivets, Casey just takes an ⅛ inch drill bit and drills in the middle of the rivet until it pops. The interior rivets are “easier” in that they have holes in the middle that the drill bit sits inside nicely. The exterior rivets are a bit trickier, so Casey uses a center punch to make an indentation in the center of the buck rivet, which he then uses to center the drill bit on so it doesn’t ding up the aluminum by slipping off the rivet on accident.
Thanks to Google Photo, I’ve got this fancy .gif to show you of Casey drilling out some already center-punched buck rivets! I love Google.
Here are some holes where rivets were drilled out, as well as 8 center-punched rivets. These are from the front area of the Airstream where the frame is attached to the body itself via the hold-down plate.
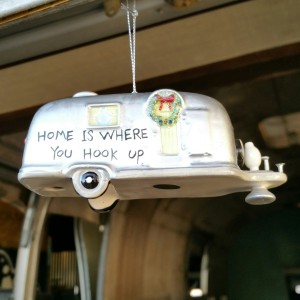
After drilling out those 20 rivets in the hold-down plate we called it a day. We had a night full of work on a friend’s shop (hey solarpro!) so we thought that was a good place to stop on the Airstream. But not, of course, before taking a picture of my newest impulse Amazon purchase! How cute right!? Can’t wait until this sentiment is a reality. Now to brainstorm job ventures that would allow for months of travel on end…
I can’t believe how far we’ve gotten in a month. I’m grateful we are making our dream become a reality. It feels good. Really, really good. Can’t wait to see what the next month holds for us. :)


