I used to be so good at this monthly blogging thing! And I always say that I have a good excuse for NOT updating you when it’s been a long time since I made a post – but I swear it’s a truth! It’s been a whirlwind since I last posted.
We ended our 2016 at our lowest of lows – losing our dearest and best friend, Burton. Which was the worst of the worst of the worst. We miss him terribly every day. Still. UGH. He was seriously the best dog. I wish I could kiss his sweet face every time I see this picture.
And less than a week later, we started our 2017 with our highest of highs – we got engaged! It was a pretty intense couple weeks with our emotions all over the place, but we are thrilled nonetheless. We know Burton would be SO over the moon happy his favorite people are finally getting married and that makes us so happy. It was the sweetest most wonderful proposal – Casey proposed to me IN OUR AIRSTREAM! I couldn’t have dreamt of a better way of getting engaged. If you’re interested, you can watch the video! The inside of Stella looked A-MAZ-ING! https://www.youtube.com/watch?v=tqZOpDkTFaE
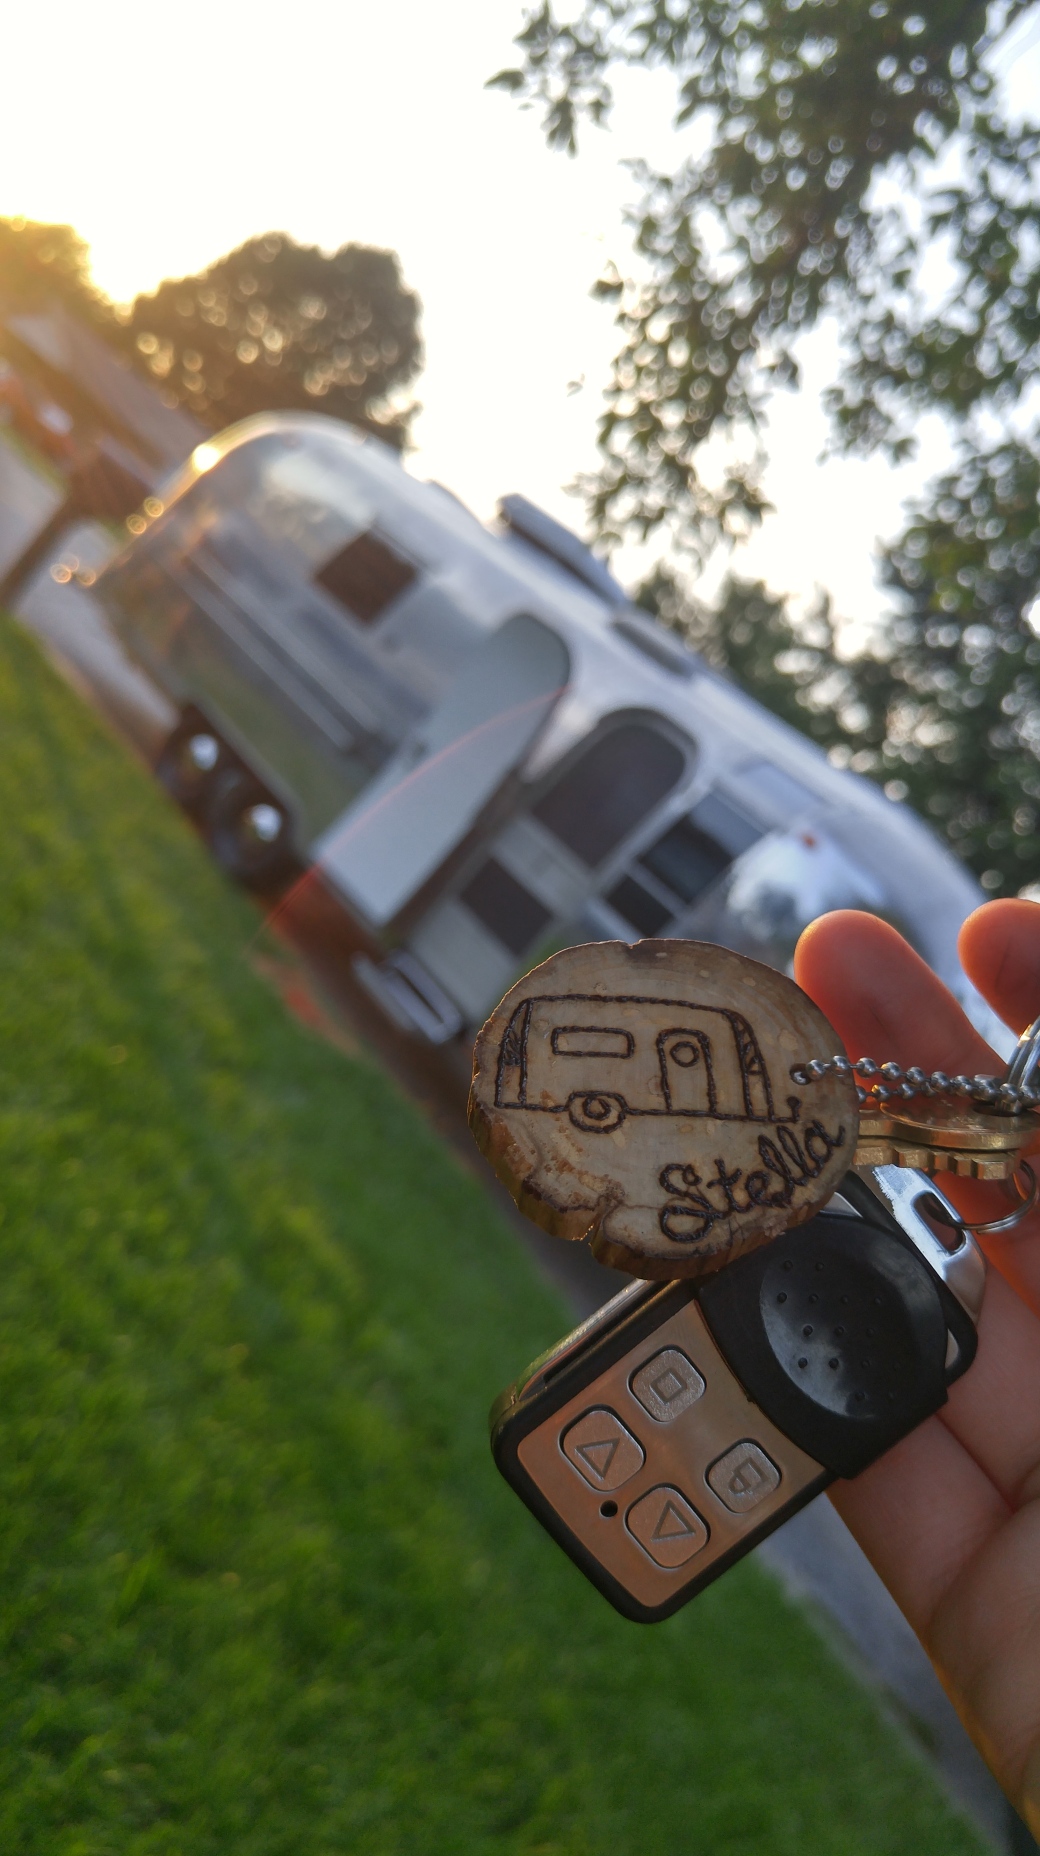
Which then leads me into my excuse for why I have been so silent this year: WE ARE GETTING MARRIED IN OCTOBER. Like, 7 months from now! Our wedding is adventure themed of course – after our Stella. And she will most certainly be there – it was our one stipulation when looking for a venue! Must be able to accommodate large aluminum camper. ;) And being that I am a new bride to be, I have been busy prepping to get hitched while my fiancé has been busy working on polishing the Airstream when I don’t need him at home! See! Told you I had a good excuse. Not great – I feel guilty not being down there and helping him nightly like I was so often last year – but we just have to divide and conquer things at the moment. I will definitely be down to help him soon!
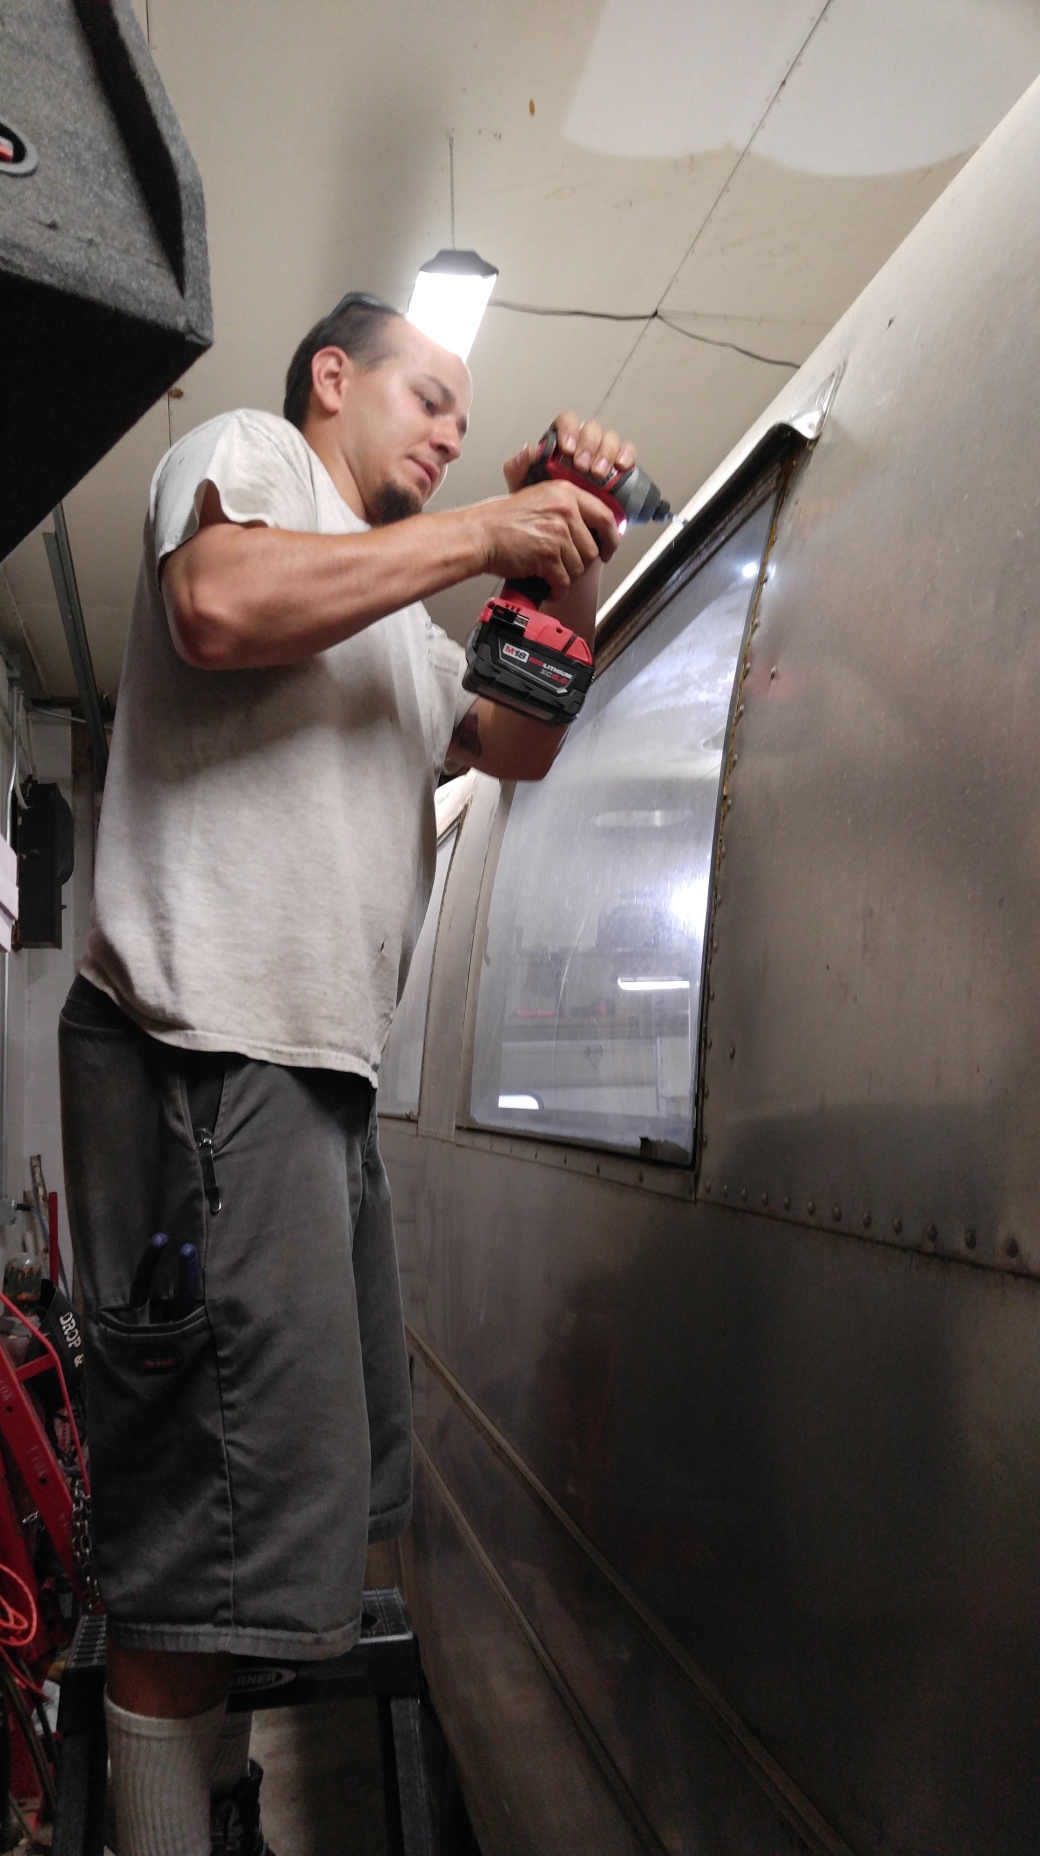
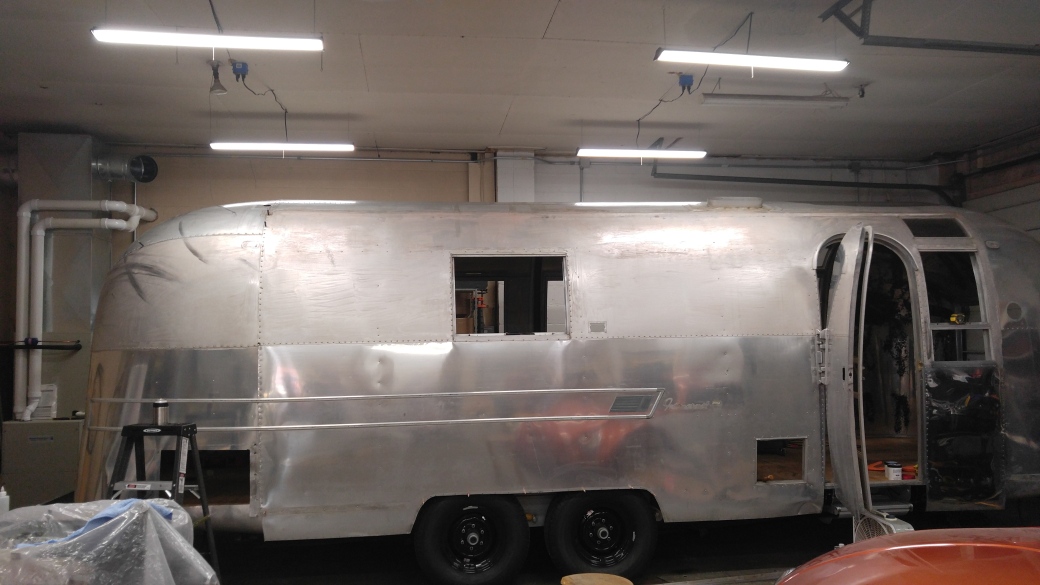
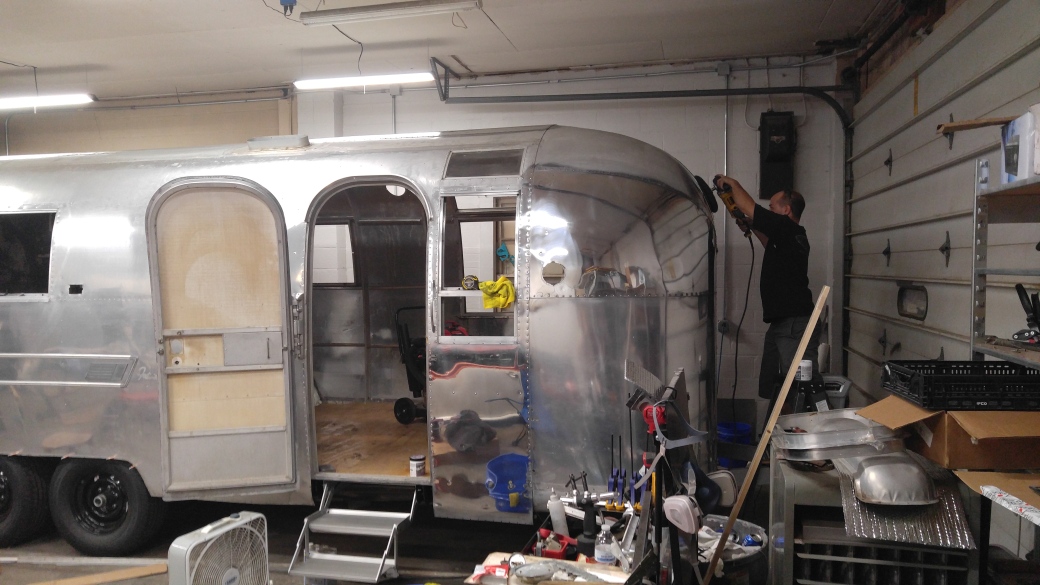
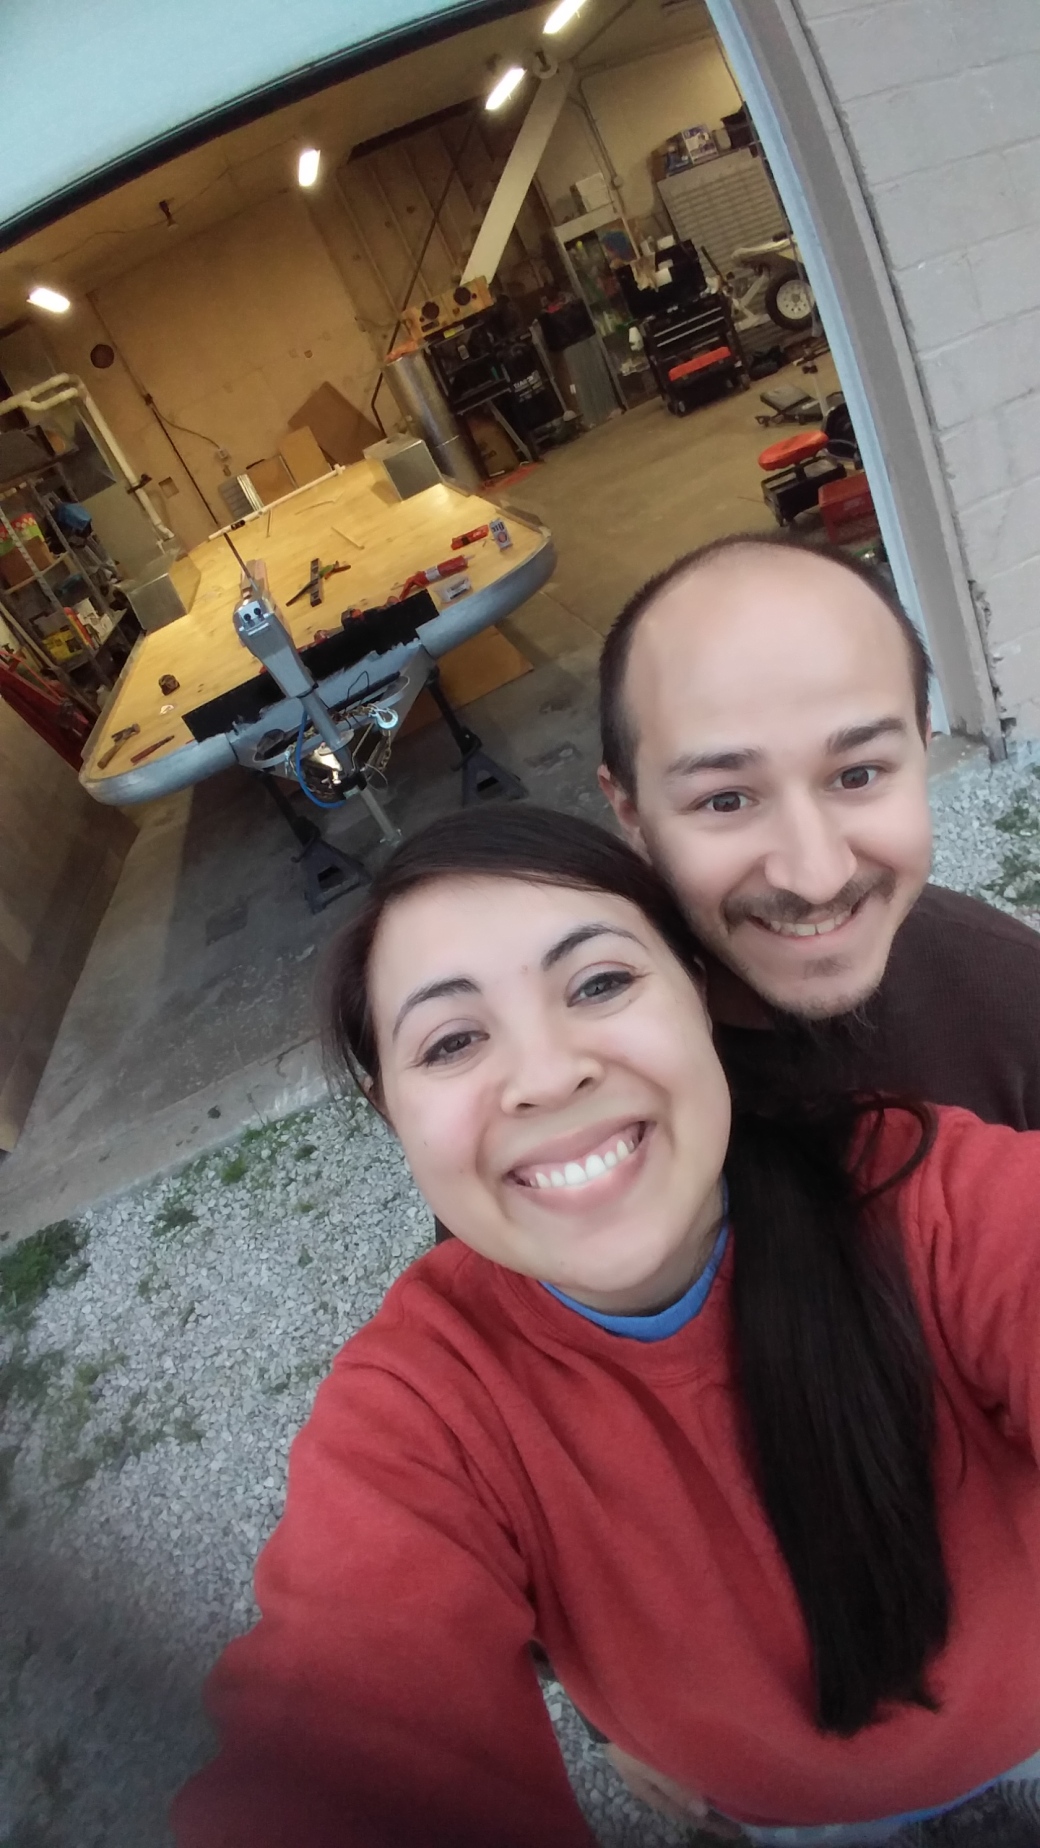
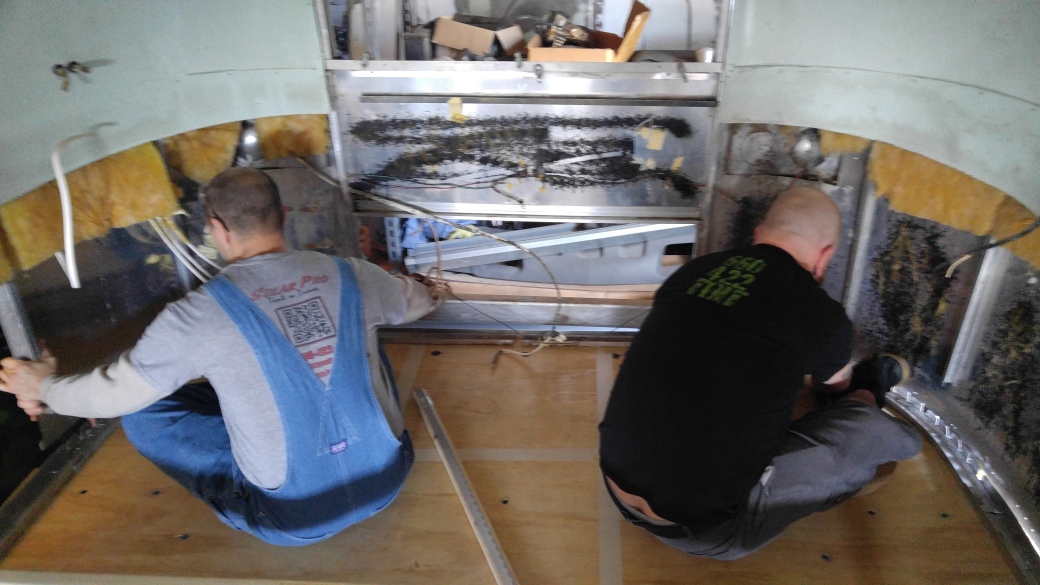
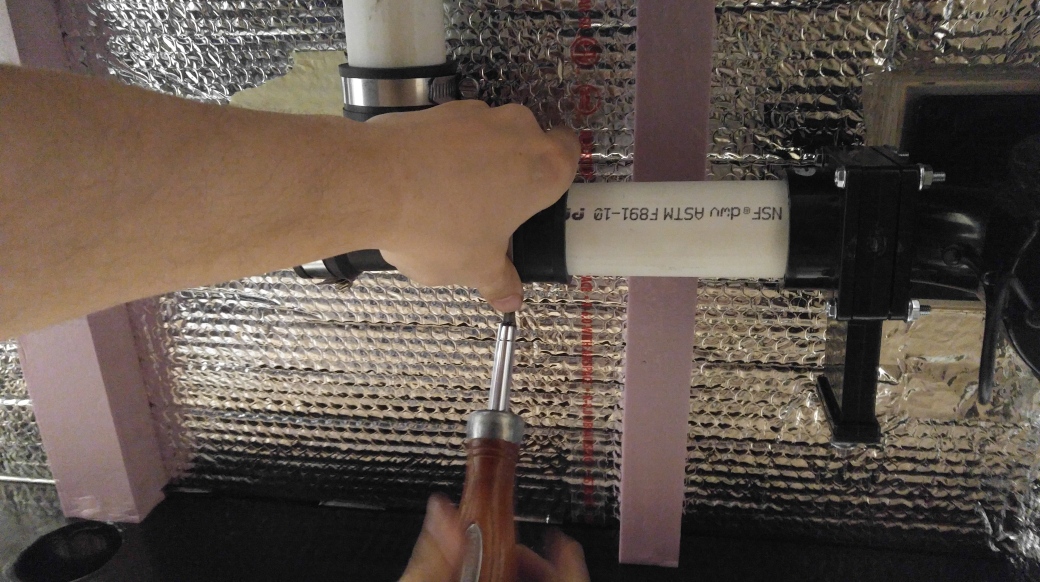
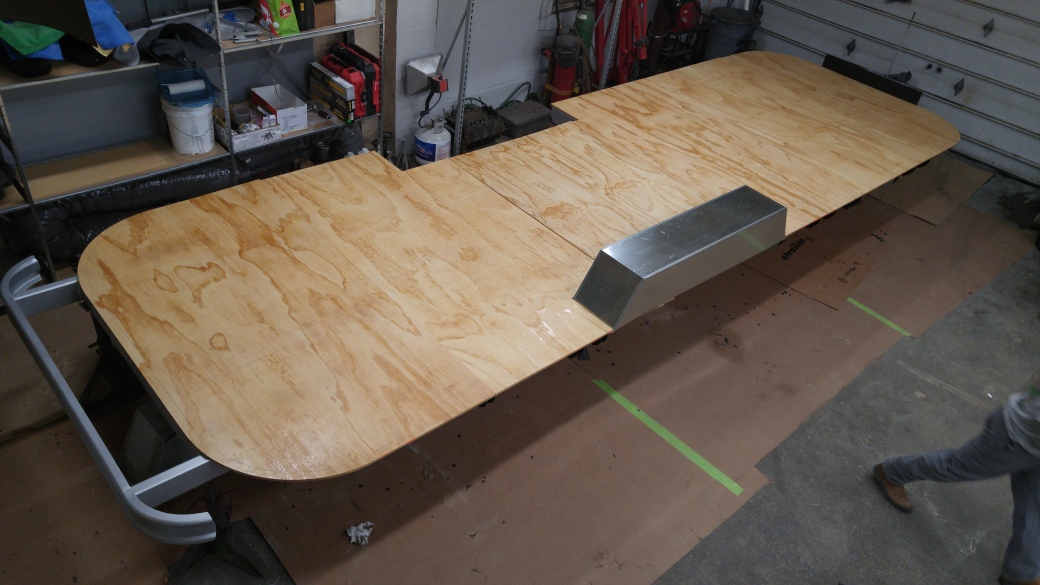
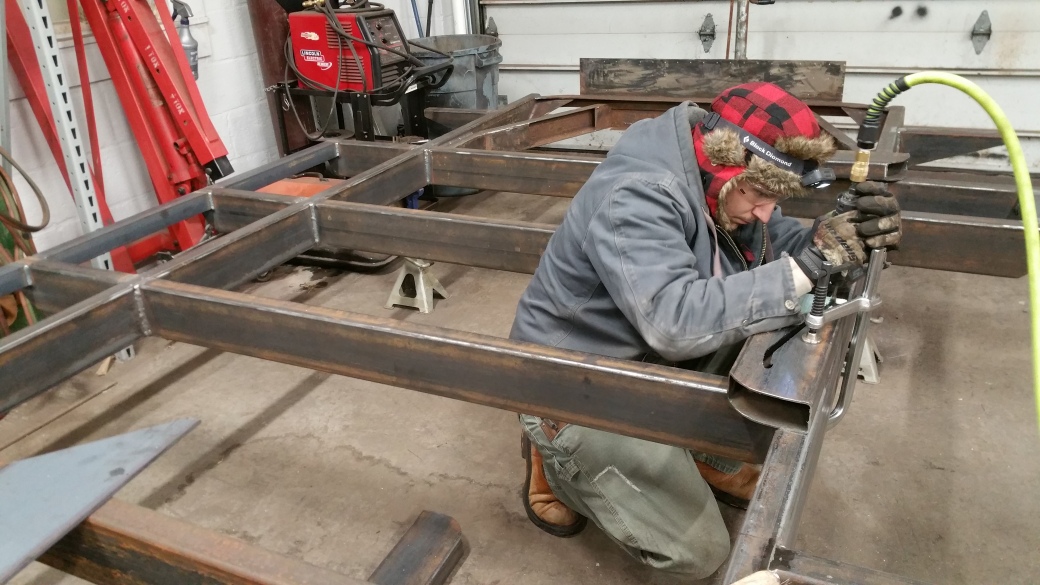
And once I start going down to help I will have more photos to show of working on Stella. Casey’s phone broke and well, the pictures he takes with his old borrowed phone are not the greatest so there aren’t many paparazzi shots as of late. But soon! To tide you over, here’s a photo I took just last week of him working away. :)
Boy I will tell you what.. we went back and forth on if we were going to polish Stella or not. I voted not, because I’m more of a practical “this isn’t something we’re going to want to maintain for years to come” kind of person. Casey voted yes, because “it’s an Airstream, it’s supposed to be shiny!” – to which I caved because I love shiny things. Needless to say, I am pretty confident Casey is totally on my side for all Airstreams to come. :) But man she polishes up nice!! That polish job will be so worth it in the end. Just another hundred some hours ahead of you honey. :)
Anyway, just wanted to give you a quick heads-up on our lives! Still working along. Not as frequently or as diligently as last year, but still working strong. We intend on at MINIMUM having her all polished for our wedding – and then just getting as much done on the interior as possible before the big day. After the wedding we will keep working on her – finishing up everything there is to finish so we can take her on a two week road trip (we think west!) for our honeymoon in the spring/summer of 2018! Yes! Hope to update you again sooner than 3 months from now! Probably we will still be polishing – but I will at least have some pictures to show of our progress!!!
For the record, I think I am hilarious. AND I love that damn song!
HELLO FRIENDS!
It’s NOVEMBER!!! Practically December.. I have been absent from my blog for a while; I apologize for that. We have just been REALLY enjoying our break from the airstream. Since we worked on it for 7 months straight we needed a serious breather. But now that we are home from our trip, unpacked, rested, and our house is less neglected than it was before, I miss Stella!! It’s been a few months since we got back from our trip and we haven’t been down to work on the Airstream once!! We ordered some buffing pads from Vintage Trailer Supply so we can start working on the polishing but just haven’t found ourselves down there to begin. Soon I imagine. I have been so loving coming home from work and vegin’ on the couch, but I can hear Stella missing us more and more every day. I think once the holidays are over we will be motivated to get back at it!
Our vacation was a raging success with a few hiccups. Our aluminum shell of a camper was wonderful. We are so glad that we took Stella out as a shell and camped before we started working on the inside. It enabled us to figure out issues we didn’t know existed – which is great because now we will be able to fix them without having to tear things out. Well; almost not have to tear anything out… but let’s get to the hiccups we experienced:
1) Our air conditioner was bouncin’ around on top of our roof. We installed the air conditioner but I guess we didn’t realize that we needed to tighten it down more than we did, because half way through the first day my dad walkie-d us and said, “we better pull over and check your AC…” and when we did, the boys had to tighten it down. Which – it was fine and dandy through our trip, but when we got home and did a closer inspection of the air conditioner we realized the internal aluminum frame has cracked and will most likely need replacing. Womp.
2) The way we temporarily installed the drain hose for the air conditioner was slightly faulty; it didn’t have enough of a slope to drain properly and it caused our air conditioner to freeze over once. Once we discovered the issue we were diligent about checking the drain hose often to make sure the water was going out which worked out fine for us, but we will need to fix that for future use.
3) Stella’s suicide door flung open (on the highway!) about 20 minutes from our stop in New York. Which dented the side of our Airstream. *insert all the grumpiest emojis* We think it was caused by a combination of factors; the dead bolt lock we installed was faulty in that the locking rod didn’t engage fully, so when you turned the key to remove it from the dead bolt it would turn the locking rod the wrong way, risking the possibility of an accident. Which, in our case, became a reality. Luckily Casey was able to get much of the dent out, and with a little more work and a lot of polishing might be able to get most of it out – or at least hide it. But like I say with everything we can’t fix on Stella, “it’s CHARACTER!” And one day it might even be a funny story! “Hey Honey, remember when our door flew open on our first road trip?!” To prevent the same situation from happening again on our trip, Casey & my dad crafted a wooden piece to wedge in front of the door that I think we will end up using anytime we travel – JUST to be safe. I found the idea for the wedge on the ol’ google and it’s a life saver!! A peace of mind keeper! I’ve linked the source of the brilliance here: http://www.airstreamcentral.com/articles/78/1/Make-Your-Own-Suicide-Door-Security-Latch/Page1.html
4) We replaced all the windows in the airstream prior to our trip – EXCEPT the top two vista windows. And go figure: they leak. Also, there is a hole we discovered in the cast aluminum frame around our door that leaks. Luckily my smart boyfriend thought that we should bring a bucket on our trip “just in case anything leaks” – and I had packed our things in Rubbermaid tubs – so when we woke up to a rain storm and realized it was raining INSIDE of our airstream too, we had enough supplies to catch the water. At first when we woke to the rain we were wooed by the wonderful sound of the rain hitting our aluminum – but then we quickly realized it was leaking inside so we were frantically looking for catchin’ bins! Again, funny story in the future. And we are really glad that this was something we discovered BEFORE we began work on the interior. It would stink to get all of our beautiful interior finished only to discover we have leaky windows.
5) We didn’t have bathroom facilities in our airstream for our trip – obviously – which I didn’t think would be an issue because we aren’t ‘middle of the night bathroom frequenters’. However, when your ability to potty in the middle of the night is taken away, magically you have to go to the bathroom ALL. THE. TIME. Especially when it rains and you’re sleeping in an airstream!!! But then, because it’s pouring rain outside, you don’t want to leave the airstream to visit the restroom, so needless to say, me and that bucket got pretty close on our trip. More than once. ;)
And frankly, those were our only hiccups! Pretty minimal for our first trip! We had a great time on our vacation. Stella is even international now because we went into Canada! The Airstream pulled AMAZINGLY – we forgot it was even back there most of the time. I would reach around to grab snacks out of our cooler and the Airstream would scare me because I would never remember she was back there.
She pulled great. I’m sure the pull will change a bit once she’s loaded down with the interior, but that’s okay. Also – we had our friend Aaron install a back-up camera in the eleventh hour before our trip and it was awesome – I literally never helped Casey back the truck up to the camper. He always did it on his own perfect every time with that camera. DEFINITLEY worth it.
We insulated the walls with Reflectix, taping it all up on the walls to keep it in place – and essentially we were rollin’ around in a lunch box. The Reflectix definitely did its job; it kept it SO COLD in the camper that at one point we even had to bust out my parents’ space heater to warm up!! Brr! Made for a sweet looking bedroom though. :) Also, in the picture below we have pool noodles around our air mattress so we didn’t wake up with a hole.
And just for the record, while it’s enjoyable to listen to rain on the roof of the airstream, it is NOT enjoyable to listen to acorns PELT THE ROOF OF YOUR AIRSTREAM IN THE MIDDLE OF THE NIGHT!!! It literally sounds like gunfire and it is scarrryyy!!! It would be terrible because a few would hit the roof, then you’d go back to sleep – only to be frantically woken up by more acorns. Ha! Assholes.
And that was it! We didn’t see many airstreams on our trip; we saw maybe 10 on the road and only a couple at our campgrounds, but we felt really cool when we’d see a fellow ‘streamer! We spent almost all of our driving time listening to our 4 VAP cds which was a good time. In fact, we were in Rob’s neck of the woods while we were in New York and it was hard to prevent being a creeper tracking him down. ;)
We are excited to begin the next phase of our renovation after the holiday. Casey will begin working on all stages of polishing the exterior while I work inside. I’ve been graced with the super stellar job of removing ALL THE FREAKIN REFLECTIX I TAPED UP BEFORE WE LEFT because we forgot to seal the seams inside before putting it up! Damnit! I thought my days of shredded finger tips thanks to metal tape were behind me, but alas, I spoke too soon. That’s okay, though. Whatever it takes! I’ve never liked my fingerprint anyhow. ;)
Thanks for sticking with me in my months of absence. I do apologize for the extra long hiatus.. I was ready to get right back into working on Stella as soon as we got home but once I got a small nibble of our old boring couch potato lives, well.. I got a bit lazy. Here’s to another goal of airstreaming in 2017!! Wishing you all the best Christmas holiday – we will see you in January!!!!!!!!!!! <3
PS — I updated our URL for our blog! You can now access our blog just by visiting http://www.StellaStream.blog !! :)
You guys. We had a LOFTY goal of basically rebuilding our airstream from the frame up and then taking it on a cross-country trip in less than 8 months. At times it felt near impossible; we had our fair share of spats, grumpy moments, and stressful situations. But it has been so exciting watching our pile of steel turn into a beautiful Airstream reborn.
The month of July we really had to buckle down if we had any chance of taking Stella to New York. EVERY single day was spent working on the Airstream — 4-6 hours every night after working our full time jobs and 12 hour days at minimum Saturday and Sunday. But we are THRILLED to say we achieved our goal. It STILL doesn’t feel real, but we’ve packed our Airstream and she’s ready to hit the open road first thing in the morning.
When we get back from our 11-day road trip,we will take a short hiatus from Stella (understandably so) before beginning phase TWO of the rebuild: the INSIDE!!! So looking forward to that part!
A HUGE HUGE HUGE thank you and shout out to EVERYONE that has helped us accomplish our goal and make our dreams become a reality. CJ, Aaron, & Sam of Solar Pro Tint’n’Tunes for letting us graciously raid your back shop to rebuild our girl, for letting us use all your tools, for never being mad when Casey steals your Olfa, for the water and donuts, for the tint & vinyl and for all your sage advice and everything else. Literally. Brad & Ryan for sacrificing so much of your family time to help us with E-V-E-R-Ything. Rachel & Sarah for not disowning your husbands on account of them helping us always. Gloria for being the best power washer Warrensburg has ever seen. Mark and Jesse for sharing in our Airstream crazies and being so strong lifting our air conditioner onto Stella’s roof. Our parents for always stepping up when we need extra hands without question. (and for feeding us!) Brian for being the best house-wife and dog-sitter we’ve ever had. Mandy for brewing us the most awesome beer we have ever seen. Colin Hyde for always answering our phone calls. All the folks who constantly encourage us to go after our dream, who are interested in what we are doing, and who take the time to ask us how our project is going. And to every one of you who read along with us. Thank you. There are not enough words to describe how much it has all meant. It makes this huge accomplishment so much sweeter and we couldn’t be happier to share it with each one of you. From the very bottom of our hearts, thank you.
Fingers crossed all goes well on our road trip! I will post a more thorough “July progress” post when we get home! xo!
Guys. It’s July. We have ONE MONTH to get Stella road ready before our trip! We are definitely feeling the pressure these days and it feels like we are back at square one with the build. Everything is old again and we spent the month of June removing all the old out of the Airstream, cleaning up the grime and gunk so we can get things ready for paint and pretties, practically ordering the entire internet, and just planning out what does and doesn’t need to be done for us to go on our first trip on August 3rd. So let’s recap how far we got!
IN JUNE WE:
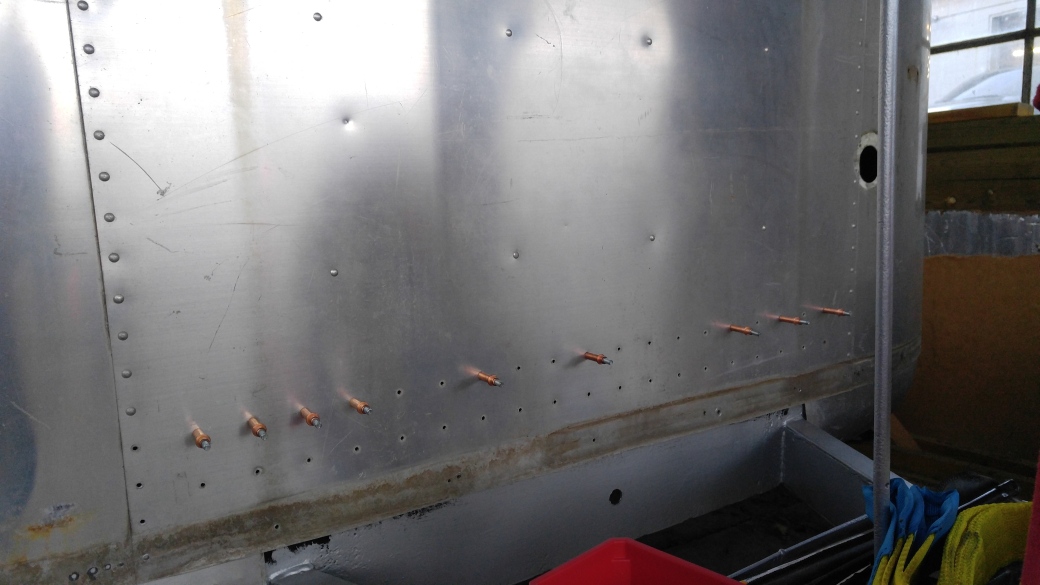
— removed practically everything! We took off most things riveted to the outside of the airstream (emblems, lights, vents, etc.), carefully uninstalled the windows that were left in tact, took out all of the old aluminum wiring, and removed the rest of the interior walls. This led to a surprise, though. Unbeknownst to us, the two rear curbside panels had been replaced at some point in Stella’s life and so the seams on those panels were littered with olympic rivets. We’re grateful that her owners at the time of her damage thought to replace the panels and it looks like the job was done well and done right (we assume it was fixed in the factory), but we knew we had to replace those potentially leaky olympic rivets with buck rivets. It’s funny because once we’d discovered that those two panels had been replaced, we started looking around the exterior and there were so many things that indicated such could’ve happened that we never saw before; probably because we were novices in the airstream game but it’s just funny looking back thinking things like, “oh, well of course we should’ve been suspect that this piece had been replaced – the A & M on the airstream logo is riveted on from the front and the others aren’t!” or “well duh, look at the heads of THESE rivets compared to theeeese rivets.” Oh well. What’s the harm in replacing another 100 rivets at this point. Chump change compared to the rest of the Airstream ;)
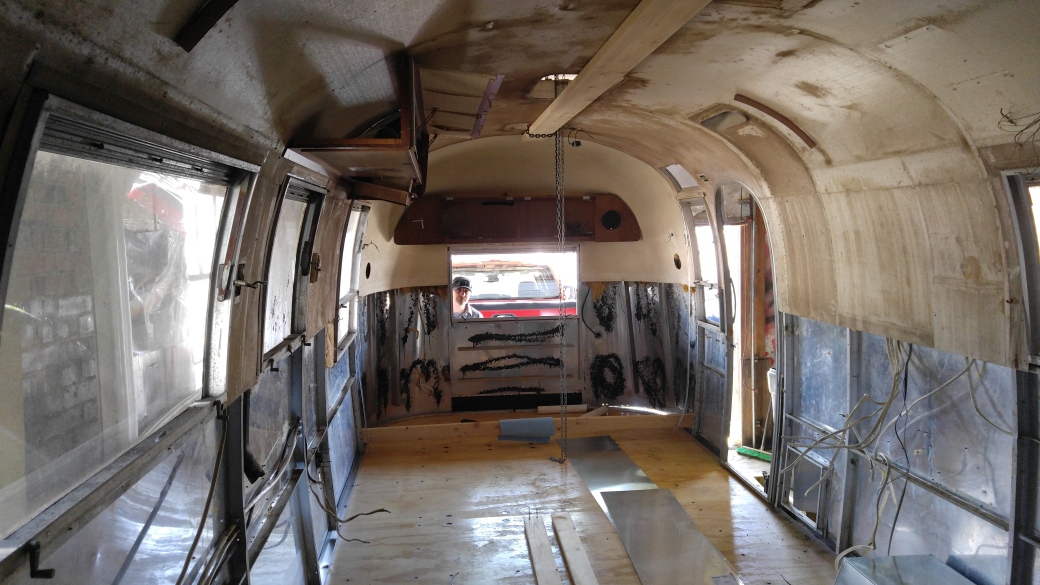
— removed all the old insulation and began cleaning things up! We rolled up the walls for safe keeping until we are ready to clean them, but I test cleaned one spot and HOLY COW those wall panels were dirty!! Also, Stella looks so much bigger with everything removed from the interior and the lights reflecting off that nice shiny aluminum. It gets really exciting looking at her like that! We started scraping off old seals from around the windows and doors – it’s hard, by the way, without a little liquid help (read-MEK), and Casey test cleaned some of the bars for the windows and they clean up so well! Lots of cleaning in our future.
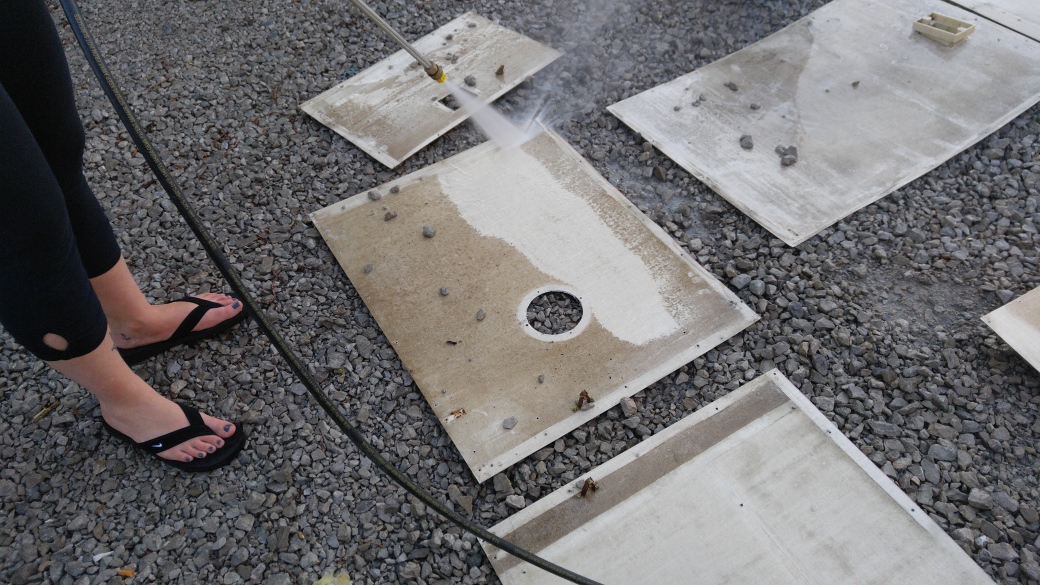
— washed the bottom wall panels and worked on removing the air conditioner “thing” from the roof. The walls cleaned up pretty well! We intend to paint over the existing texture that’s on the walls so we were mainly focused on just getting the real yuckies off and it seems to have worked. I power washed the bottoms for a bit but it was mostly hand scrubbing; the power washer wasn’t doing as well to get everything off as I had hoped it would’ve, but the job went quick regardless. Casey’s job, on the other hand, was a booger. Our previous owners were firm silicone believers and boy did they ever cover the roof in that crap! Casey had a hell of a time trying to get that air conditioning thing off. But he’s awesome so of course he got the job done.
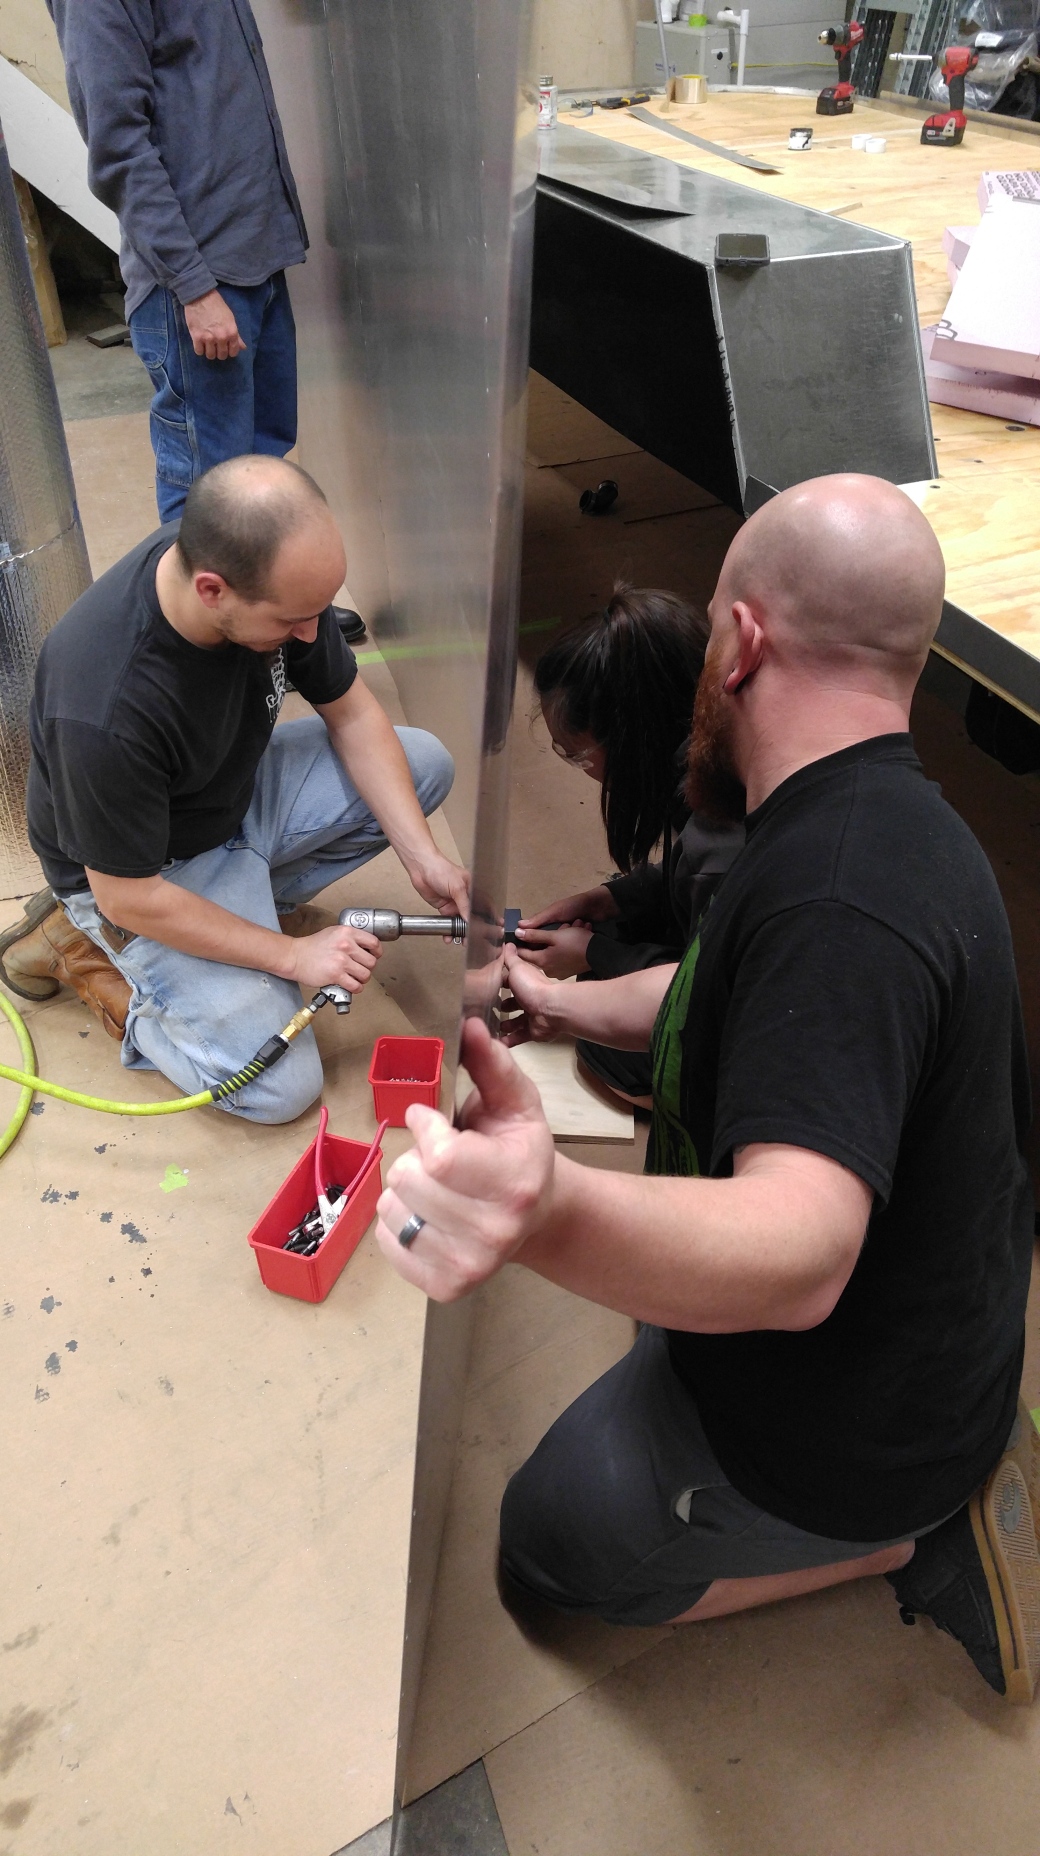
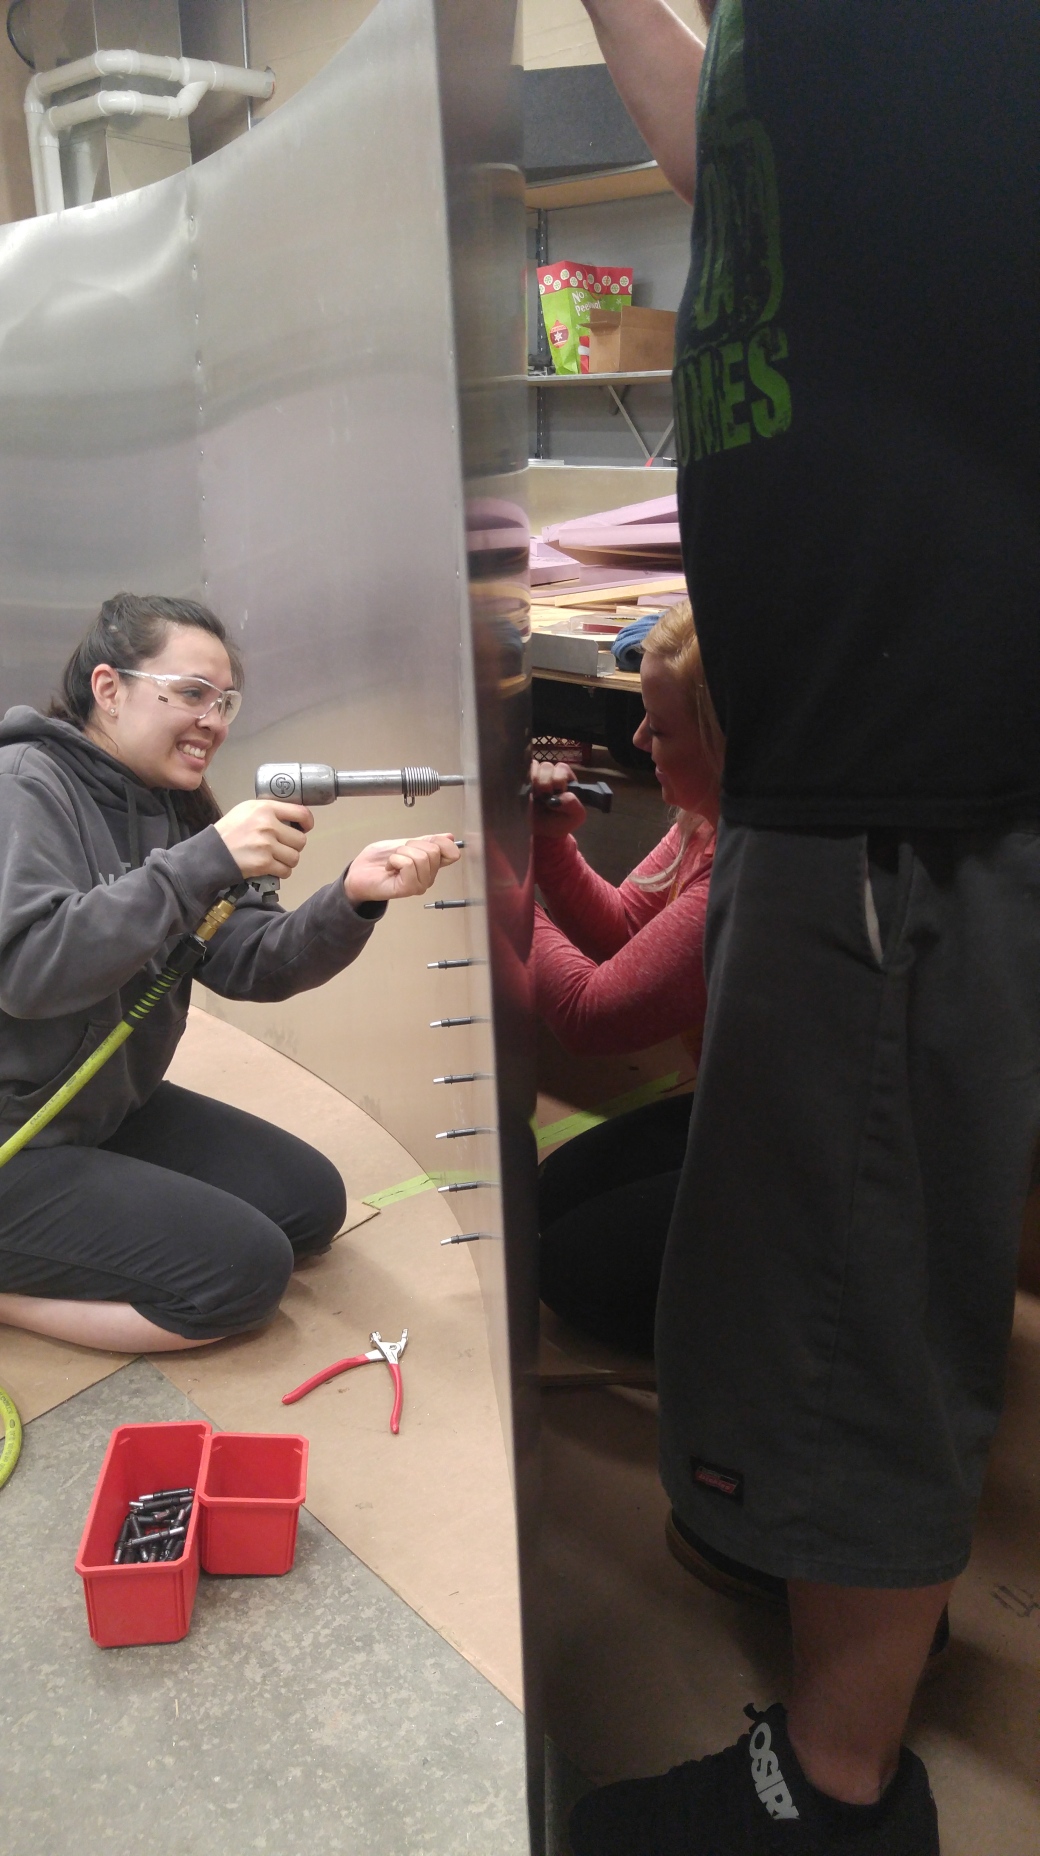
— drilled out all of the olympic rivets and began replacing them with buck rivets instead. It was a job both Casey & I did together so there aren’t many pictures but I do have a video of Casey drilling out some olympic rivets — which, we discovered, it’s easier to center punch the olympic rivets than it is to drill them out. But watch out, whoever is on the inside while this happens, because those center mandrils FLY AT YOU when you aren’t expecting it! ;) Also we received and test fitted our Fan-Tastic Vents! LOVE!
— we cleaned some more… more sealants and old caulking to remove. ALWAYS more to remove it seems. BLAH. We did read and discover that MethylEthylKetone (MEK) is the way to go. Sure it’s carcinogenic and can cause severe damage if used improperly, but by God it works so much better to remove the old yucks than just a scraper did. I worked on all the windows while Casey worked on all the crap + silicone on the roof. There aren’t many glamorous pictures of this step either because I certainly didn’t want to touch my phone while covered in grossness. I found my best plan of attack for removing the black seals around the windows & doors was using a squirt bottle of MEK and a toothbrush & scraper, plus a beer can filled with MEK to rinse off my toothbrush and a rag/paper towel. I’d just squirt a bunch of MEK at the top of the window frame and let it run down all the sealant I needed to remove, let it sit for 30 seconds, then start scraping it all off. Once most of the big stuff was off, I’d bust out the toothbrush and start scrubbing the remnants off while continuously squirting the frame down with MEK. The MEK flashes fast but man it’s worth the investment. Casey even got it to work on the silicone up top!
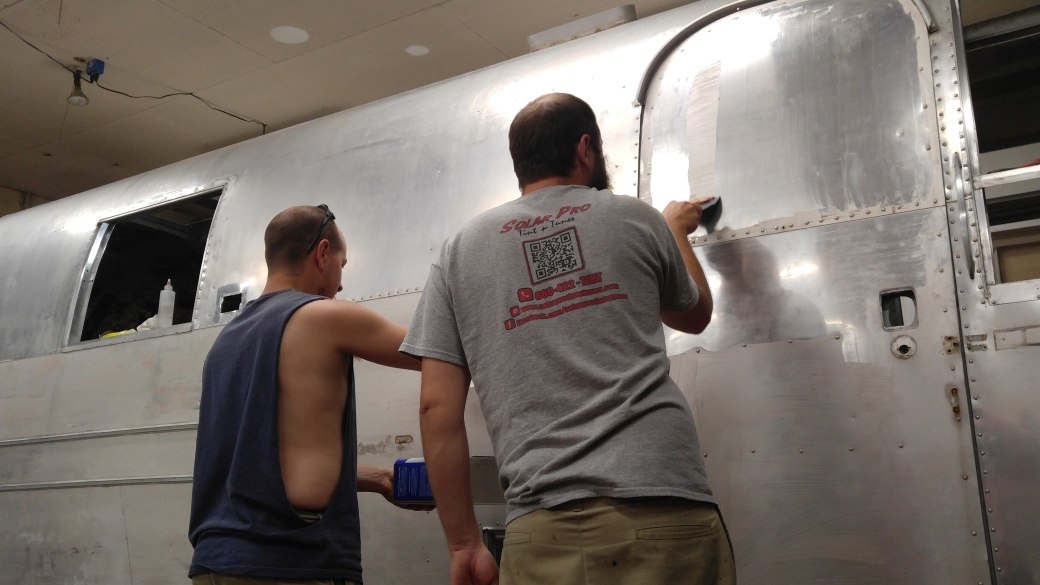
— WE CITRI-STRIPPED!!!! Guys, this was so so so so satisfying! We knew we wanted to remove the old clear coat that was on the airstream but mano did that citri-strip do a good job doing it! We were shocked; it was like night and day. And so easy! Just paint the citri-strip on, wait for at least 30 minutes, and scrape off. Voila! Clean up with some soapy water and you’ve practically got yourself a brand new airstream. It’s weird how the stripper gets kind of soft looking as it begins to break down the top coat.. I tried to show that in the 3rd picture. And the second picture shows the three stages of stripping; the left side has stripper on, while the top right hasn’t been stripped and the small bottom right section has been. Also mind you, it didn’t make the aluminum perfect looking; there are some spots that are still blemished and will polish out when we get there but overall she looks so much better than before. While we waited the 30 minutes between coats we did productive things like drill out the rivets between the pieces of old belly pan we are replacing with new (the parts that curve under to attach the body to our new belly pan), clean up the frame for the solar dome, remove the rest of the lights and things we didn’t get to before (so we can strip underneath of them) and the boys put in some more buck rivets where olympic rivets were before.
BEFORE STRIPPING
AFTER STRIPPING
Top NOT stripped, Bottom stripped.
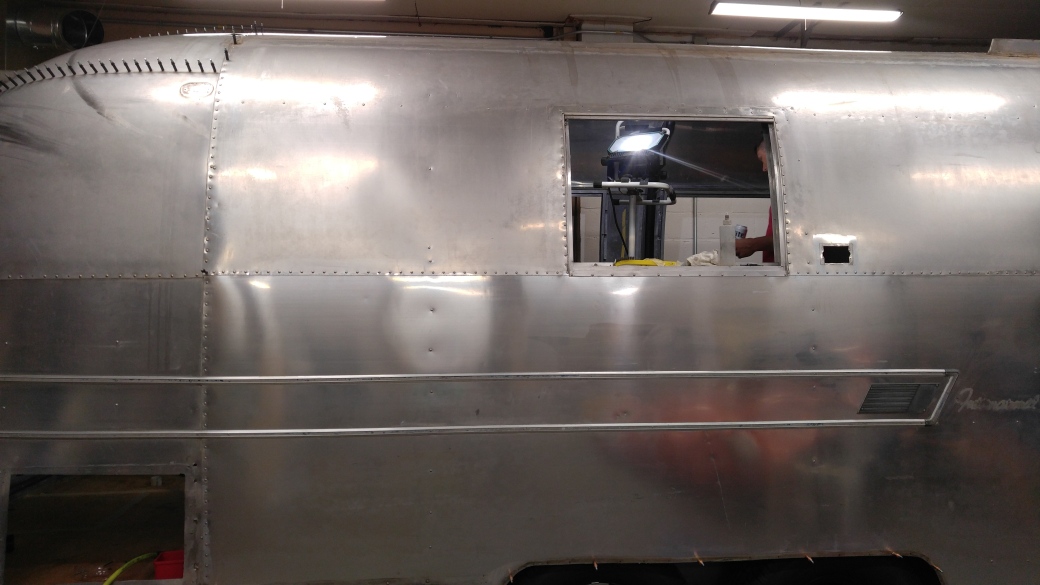
— we got our rock guard in the mail and we love it! Can’t wait to put it on. Also, we citri-stripped the other half of the airstream AND the polishing compounds came in the mail as well so of course Casey tried his hand at it. Boy does Stella polish up pretty! It’s amazing what just one stage of that polishing compound does; can’t imagine how amazing she will look after all three stages. Unfortunately, we are going to have to save the polishing for after our first trip; there are just too many things to do that are more important right now. But soon she will be a mirror!
— we convinced our friend Mark to join the aluminum side!!! A few weeks ago he had been out driving and stumbled upon an Airstream in a neighboring town and had inquired about it for us; the owner was willing to sell it! Mark told us all the details about it giving us first dibs, but was interested in the Airstream himself. Considering that we have a lot on our plates right now we told Mark if he was serious about it he should definitely buy it – AND THEN HE DID!!! We helped him tow the airstream to its temporary home and we geeked out a bit towing an airstream for the first time, even if it wasn’t ours. We were super happy and mildly jealous of Mark. Hopefully the next Airstream we stumble across like that will be ours! 31 feet of 70’s glory. We LOVE that front window with the rock guard!
— butyl taped and cleco-ed the lights on! Originally our plan was to do the first stage of polish underneath all of the things we would be reattaching to the airstream (vents, lights, etc) and then doing the rest of the polishing at a later time. But as I mentioned earlier, even the initial stage of polishing just became too time consuming with all the OTHER (more important) things we have to get done before August, so Casey & I talked it over and we chose to shelf the polishing all together (for now) which made it possible for us to start putting things back on the Airstream sooner rather than later. Yay! We don’t have the right size rivets yet; we had to order some from Fastenal, but they should be in after the holiday weekend and we can get those things attached permanently. And great news – the lights work :)
— power washed the lower panels of the walls thanks to some help from our friends! I had volunteered my friend Gloria to help me power wash the lowers. I thought cleaning the lowers was going to be like the tops, where the power washing didn’t do much so we would need to hand scrub both the pieces as well. I was wrong on ALL accounts. My first mistake was that there were only two panels… We took the lower panels off at the very beginning of our restoration adventure (read – Feb 2015 maybe!?) so I had forgotten how many there were! There were lower panels coming out of the shop left and right it felt like so I was glad to have recruited some help. As opposed to two panels, we had like 15! But luckily I was also wrong about the power washing not working. Most of the grime just came right off under the pressure of the water! And whatever was left Mark scrubbed off with a broom and wam bam thank you ma’am we were done cleaning all the lower panels in 45 minutes. WOO! Plus the weather was IDEAL so it made the whole thing even better. Win win all around.
Aaaand that was the last thing we got accomplished before the 4th of July weekend! We go to the Lake of the Ozarks every year for the 4th. We ended up spending 5 days away (Thursday 30 June – Monday 4 July) and while it was super duper fun, now is crunch time and we will be spending every moment we aren’t at our jobs or eating down at the shop working on Stella. LITERALLY.
Our list of things to do before August 3rd includes:
– install windows
– install vents
– install AC
– install lights
– install rock guard
– wire
– insulate
– re-install walls
– have Jordan weld some holes in the aluminum
– cut patches
– install patches to exterior
– put in the last of the rivets to the body
– cut aluminum for belly pan pieces
– finish belly pan
– put all trim pieces on
– seal ALL seams on the Airstream
– check for leaks
– spare tire (buy tire, already have wheel)
– buy lock for door (looking for keypad with knob – why is it so hard to find?!)
– re-screen the screen door
– install seals for windows/doors
– paint the roof
– paint the interior?! could get shelved for after our trip.
– license & title Stella
And that doesn’t even include the stuff I forgot to put on my list, or all the stuff we have to do to prep that doesn’t involve working on the Airstream — like buying things for our trip! GAH! Pressure is on. The days are flying by. We aren’t 100% positive Stella will make the first trip in August, but we are working every day to hopefully get her there. If she doesn’t get finished in time, that’s okay too.. we can always sleep in my family’s camper since they are going with us. But why have a goal if you are quick to give up on it?! So we are trying. REALLY REALLY hard. Keep your fingers crossed for us that we make it! We’re going on vacation in 25 days! OMG!
May has come and gone and boy was it a rewarding, frustrating, trying, exciting month. Also, gonna go ahead and toot my own horn here because it’s THREE days into June and I’m already making a blog post! HEY! ;) We are making good headway on Stella; we are a bit ‘behind’ schedule in relation to the list we made and the progress we thought we would’ve made by now, but I think we will be ok. In May we thought we would’ve gotten the fans, windows, and interior skins back in .. and in reality we just barely got the body permanently attached before the month was over – something we thought we would’ve accomplished in April. But alas, all is well. We will be ready come hell or high water for our maiden voyage in August – which is a mere 61 days away……….. #nopressure
IN MAY WE:
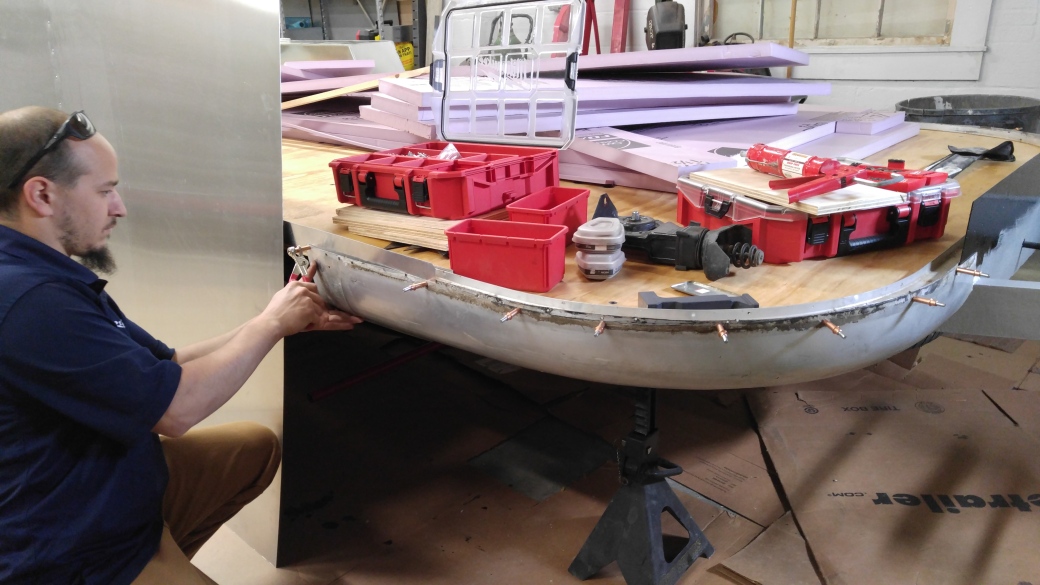
— finished up the belly pan and attached the banana wraps!
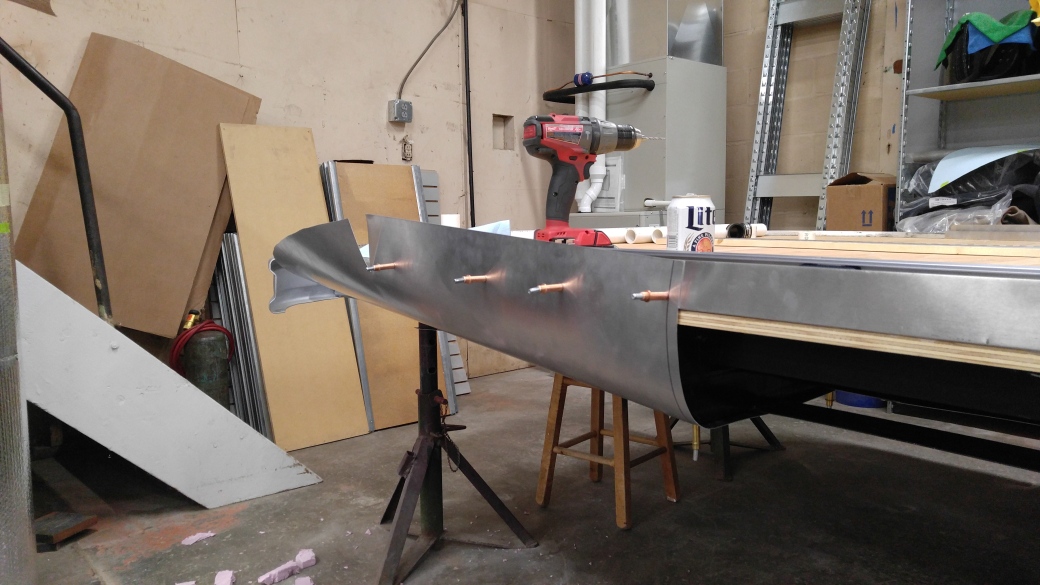
— began work on the rear curved/angled belly pan pieces and seam-sealed the wheel wells. Let me tell ya, those rear pieces were a BEAST. SO hard! We cut the aluminum extra big to give us space to cut-to-size after we’d got our final shape. We put a curve into the aluminum by rolling it over our acetylene tank. But hands down the HARDEST PART was trying to get the aluminum to curve under with the belly pan, but also angle up towards the back to attach at the c-channel. IT WOULD NOT DO WHAT WE WANTED. We used thicker aluminum than originally used on Stella so the thicker material made it hard to bend and angle the aluminum like we needed it – there was a lot of frustration, probably a little cussing, and stepping back and taking time away to re-assess our situation to find answers when we were less frustrated. We knew what we needed the aluminum to do, we just couldn’t figure out how to make it do it without there being an excess amount of aluminum bunching up and being ‘pointy’ in the angle changes.
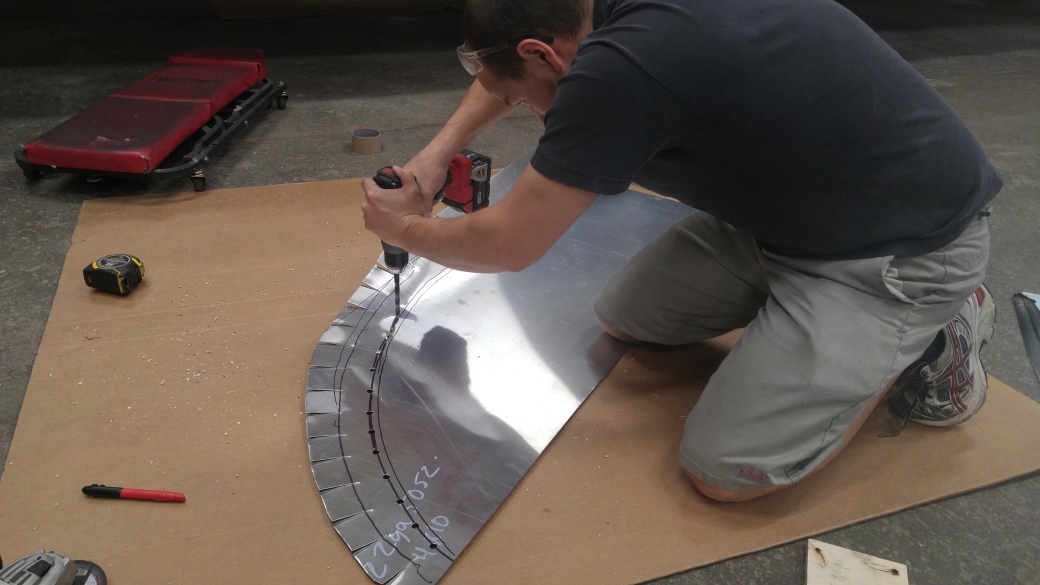
— re-evaluated our plan for the rear pieces and tried a new technique. Originally we had cut slits into the aluminum to make the curve, but when we’d fold them over on each other to make the actual curved shape it would make points where the pieces met instead of curving seamlessly. There was clearly excess aluminum but we were unsure how to remove the excess. Thanks to pictures from Vinstream on the Airstream Forums, we drilled holes at the base of where each slit met and then tapered the slits a little; this eliminated excess aluminum and gave us a better way of curving the metal without it bunching. And thanks to a little help from our niece, it’s finished. ;) It by no means is perfect and beautiful, but damnit it is DONE and we are thrilled to have tackled the issue and moved on. OOF. Plus we coated our wheel wells with undercoating to get them road ready!
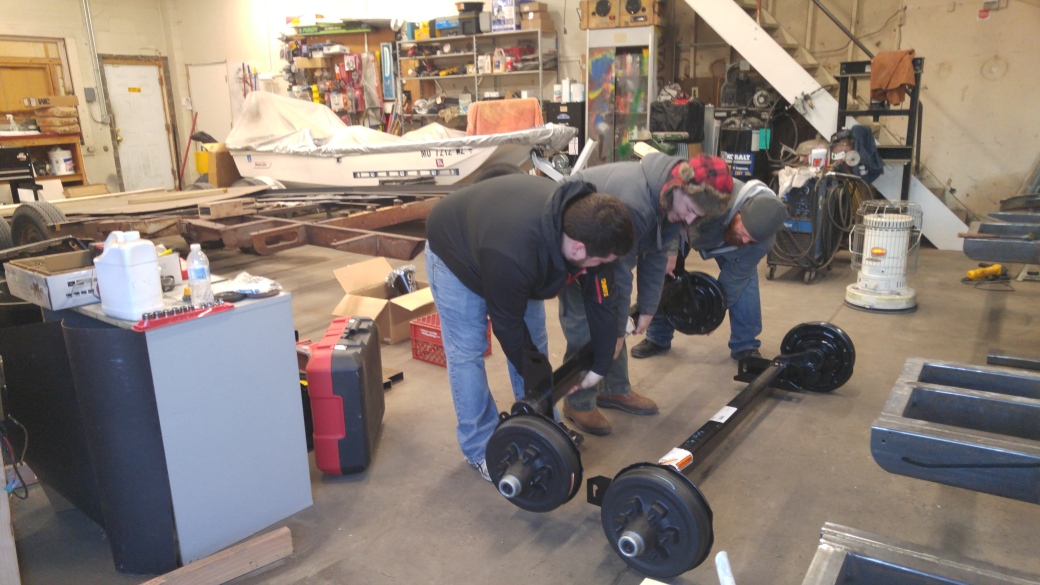
— put our axles on! and our tires on! AND NOW STELLA IS STANDING ON HER OWN 4 “FEET”!!! Casey and I tackled this job on our own and thanks to a jack and our brute force we got them secured on! It was mildly nerve wracking considering those axles are HEAVY but we managed. We made sure to seal around the belly pan where it met with the axle plate to hopefully eliminate any water from getting in. Then it was just a lot of coaxing the axles into the right position in relation to the axle plate so we could bolt everything up right. We still have to cut the wheel wells in relation to the curve of the body but that will come at a later date. For now the wheels tuck nicely under the wheel wells and we are pleased as pie that she is no longer propped up on 4 jack stands; just 4 wheels and her jack. (Also a fun factoid for you: metal shavings cling to leggings like NOBODY’S BUSINESS. Ouch.)
— tried our hand at polishing (with tools we had on hand; not the ones we’ll eventually be using), attached the trunk belly pan to the rear of the body, and bought Stella her own Scentsy!
— MOVED STELLA’S FRAME BACK UNDER HER BODY!!!!!!!!!!!!!!! I felt like I was on the verge of being sick watching Stella roll out of that garage bay for the first time; what if something went wrong?! But true to Casey’s brilliance all went perfectly and she rolled like a dream. And seriously, we are forever and ever grateful and indebted to our amazing friends; not only do they let us use their building to work on Stella but they HELP ALL THE TIME with the project! If it weren’t for our SolarPro crew & our family we would be so much further behind on this project. We rolled Stella out of one garage bay and rolled her underneath the body in our shop (Casey did it PERFECTLY first time by the way) and everybody pitched in to help line the body up with the frame and bring the two parts together. And insert even more sentimentals, but believe it or not our literal-built-from-the-floor-up frame that we transferred the original tongue & curved c-channels to lines up PERFECTLY with the holes in the body that we haven’t looked at since we rolled the body out a year ago. I can’t even believe it. Literally it gives me goose bumps every time I think about it – my boyfriend is THAT good. It is such a rewarding, validating, proud feeling to know that 4+ months of building a frame and crossing our fingers hoping we did it right has paid off. In a HUGE way.
— got our steps! But that’s a troublesome issue for next month…
— re-attached the body to the frame. Truthfully – this was the second difficult part of the build that we’ve encountered. While the frame fit under the body perfectly, we could only get 3 out of the 4 corners down without struggle; the rear curbside curve always gave us issues. We could coax it down with a LOT of help, but we weren’t sure if that was normal or if the amount of effort we had to put behind it meant that the rear was too wide. We certainly didn’t want to force the body on only for it to mess up the body so we backed off. Plus some of our ribs were either too long or would hit the bolts we added to affix the c-channel to the floor so we had to trim them up a little. But then the body would bottom out underneath the door and we were unsure if that was supposed to be trimmed up or not. And being that we have never done this before, we were sort of at a loss for answers. And I freaked a little. So Casey put in a call to Colin Hyde and as always he reassured us that we were doing a fine job; that it isn’t unusual to have to coax the body into place. That it helps to put physical pressure down on the windows and other applicable openings to force the body down (without jarring the body up of course), and if that doesn’t work, we could even go so far as to put ratchet straps through the windows and tighten her into place. Plus to make sure we trimmed up all the ribs to prevent them from bottoming out, and to trim the subfloor underneath the door jamb to enable the body to sit snug against the floor. He also told us that he doesn’t seal between the body & the frame; something we were dreading because if it was that hard to get the body on without the sealant, imagine how much messier & difficult it would be to test fit, re-lift the body off, apply sealant and then attempt to coax the body on with the goo! Hard pass!!! So with Colin’s sound advice, we ventured down to the shop and did just as he told us; we trimmed and shoved and wiggled and shifted until everything sat perfectly. We started by lining up the body with the hold-down plate we transferred from the old frame to the new frame and just worked our way around until she was good and tight on the frame. And by golly once she was sitting pretty we immediately started drilling holes to put those clecos in because we did not want to do that again!
— riveted that body into place to make Stella all one piece again! I was the Bucky to Casey’s Rosie and together we got probably 92% of the body’s buck rivets in on the first night. We had to bring other bucking bars down the next night to get in a few tricky areas but we got everything attached lickity split!! Stella is back together!! **INSERT ALL THE HAPPY EMOJIS**
And just like that, May is over! It was a month full of huge steps forward and our first few really frustrating situations but we are happy to have made it as far as we have. We are ready to roll Stella back over to the other shop (it’s more climate controlled, plus our friends are over theres) and get started on phase two of the renovation. I think this will be the hard part in relation to what we have been doing; everything up until this point has been building all new — now we have to work with what we have. Remove everything, (the inside walls, the insulation, the old wire) clean everything, and begin putting everything back together. But while it will possibly be harder, I think it will go quick and it will be just as immediately rewarding and satisfying as the first half of the project and we can’t wait to dive right into it! Here’s to huge progress (and some late nights!) in June.
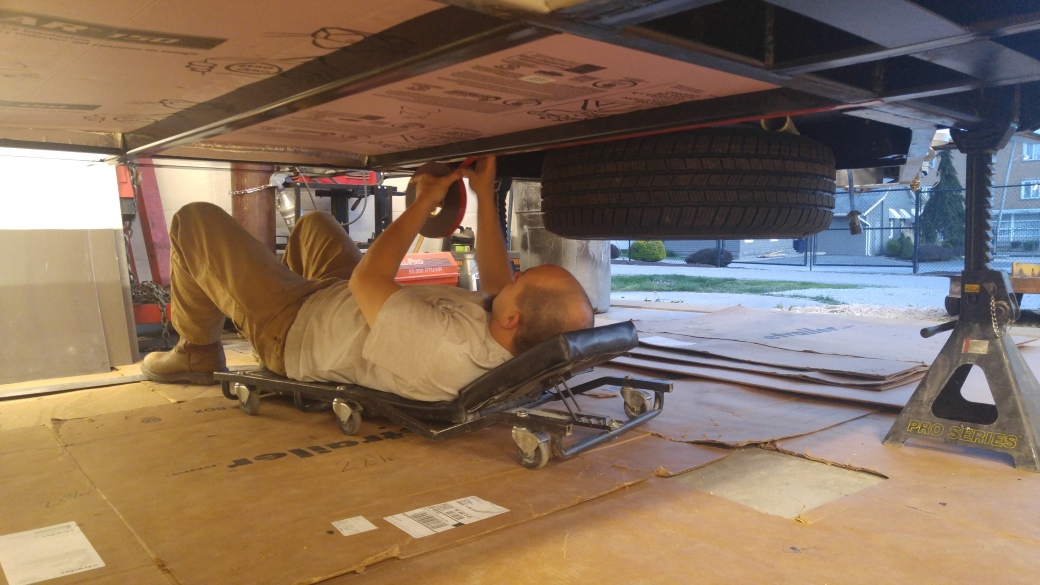
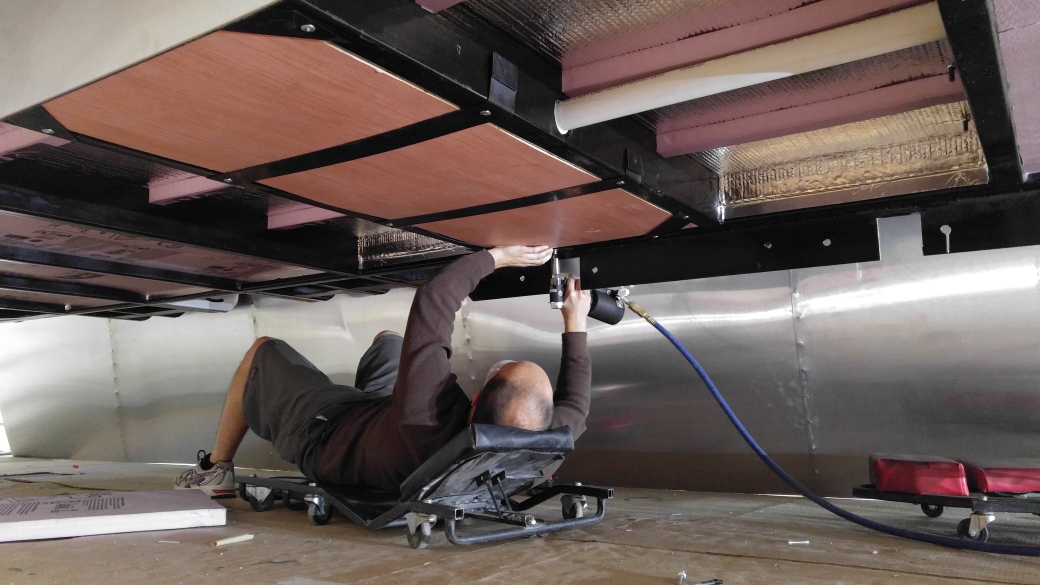
We spent April getting the underside of our frame ready for the belly pan. Because I was adamant we would not be flipping the frame, the boys spent most of the month on creepers underneath Stella. #sorryboys Note to self: If we do this again, we need to invest in a rotisserie for airstreams. They make it look so easy! But really, I don’t think it was terrible – only a handful of nights of dead arms and a few days of clothes covered in metal shavings from drilling out holes but could be worse, right!? I say that but remember, I’m the historian, not the hole driller. ;)
IN APRIL WE:
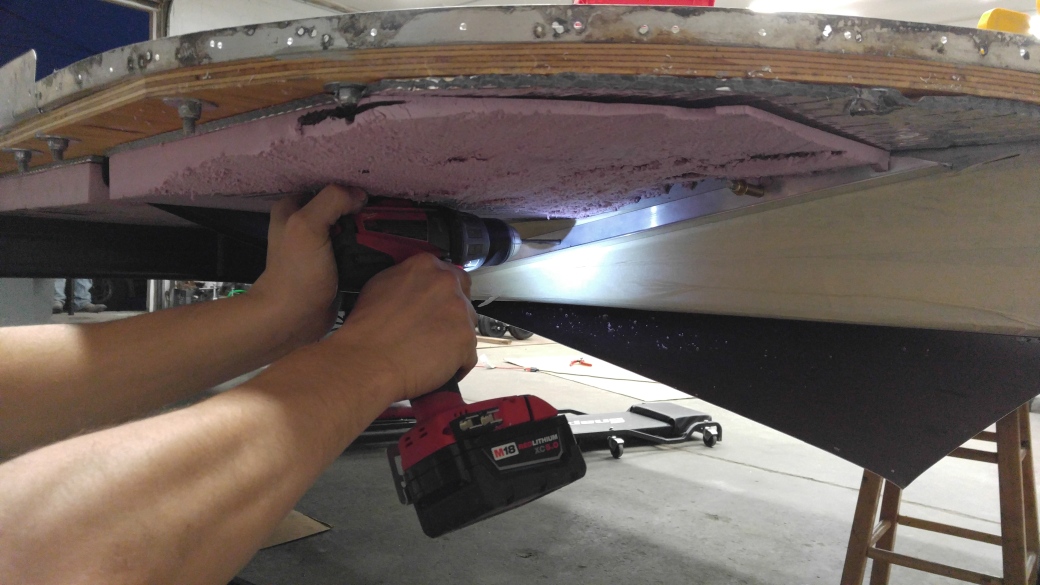
— insulated the underside! We put a layer of reflectix in each section, then a 1.5 inch air gap created by cutting our foam into 3 strips divided in the sections, and then put the 1.5 inch foam cut to size in each section. I also learned that the sound of foam insulation SCRAPING against the painted metal in each section is pure torture and I am SO GLAD THAT PART IS OVER. WORST SOUND EVER. We also installed 3M double sided tape to help hold the belly pan up when we were to that part later down the line and we officially said goodbye to the welder! Small milestone!
— impulsively got our 10 year old dog neutered, which meant we had to spend a few nights at home with him instead of airstreaming to make sure all was well with him. Good news – it is :) Sorry Bub!
— drilled holes in the belly pan pieces to attach them together. We used a piece of wood with pre-drilled holes to help us space out our rivets. Also our order from Airparts Inc came in – we have clecos! They’re fun.
— clecoed our belly pan together. Originally we had planned to put the belly pan up in individual pieces but when we started looking at things we realized our holes wouldn’t line up with the cross members perfectly; they’d all progressively be about an inch short – so our only option was to rivet the whole belly pan together and put it up as one large unit. It would make things more challenging, but not impossible. We also started working on the plumbing we needed to finish up before putting the belly pan on.
— plumbed some more! We got the handle for the dump valve installed and it works like a dream. Plus we committed to where our shower will be and started taping off where things will be laid out in the Airstream! Exciting!
— riveted the belly pan together!! I can’t believe we finally started putting Stella’s first rivets in. We all had a great time as you can tell. Plus all the helping hands made it worlds easier! Special shout out to Glo for taking pictures of me working ;) and for being the Bucky to my Rosie – much like CJ was the Bucky to Casey’s Rosie!
— got the curved banana wraps cleco-ed back into place! This step felt especially great because the rivet holes from when the banana wraps were originally put on still line up perfectly when we put it on now. Such a validating feeling! Also we created a template so we knew what shape of aluminum to cut for the belly pan piece that would be underneath there.
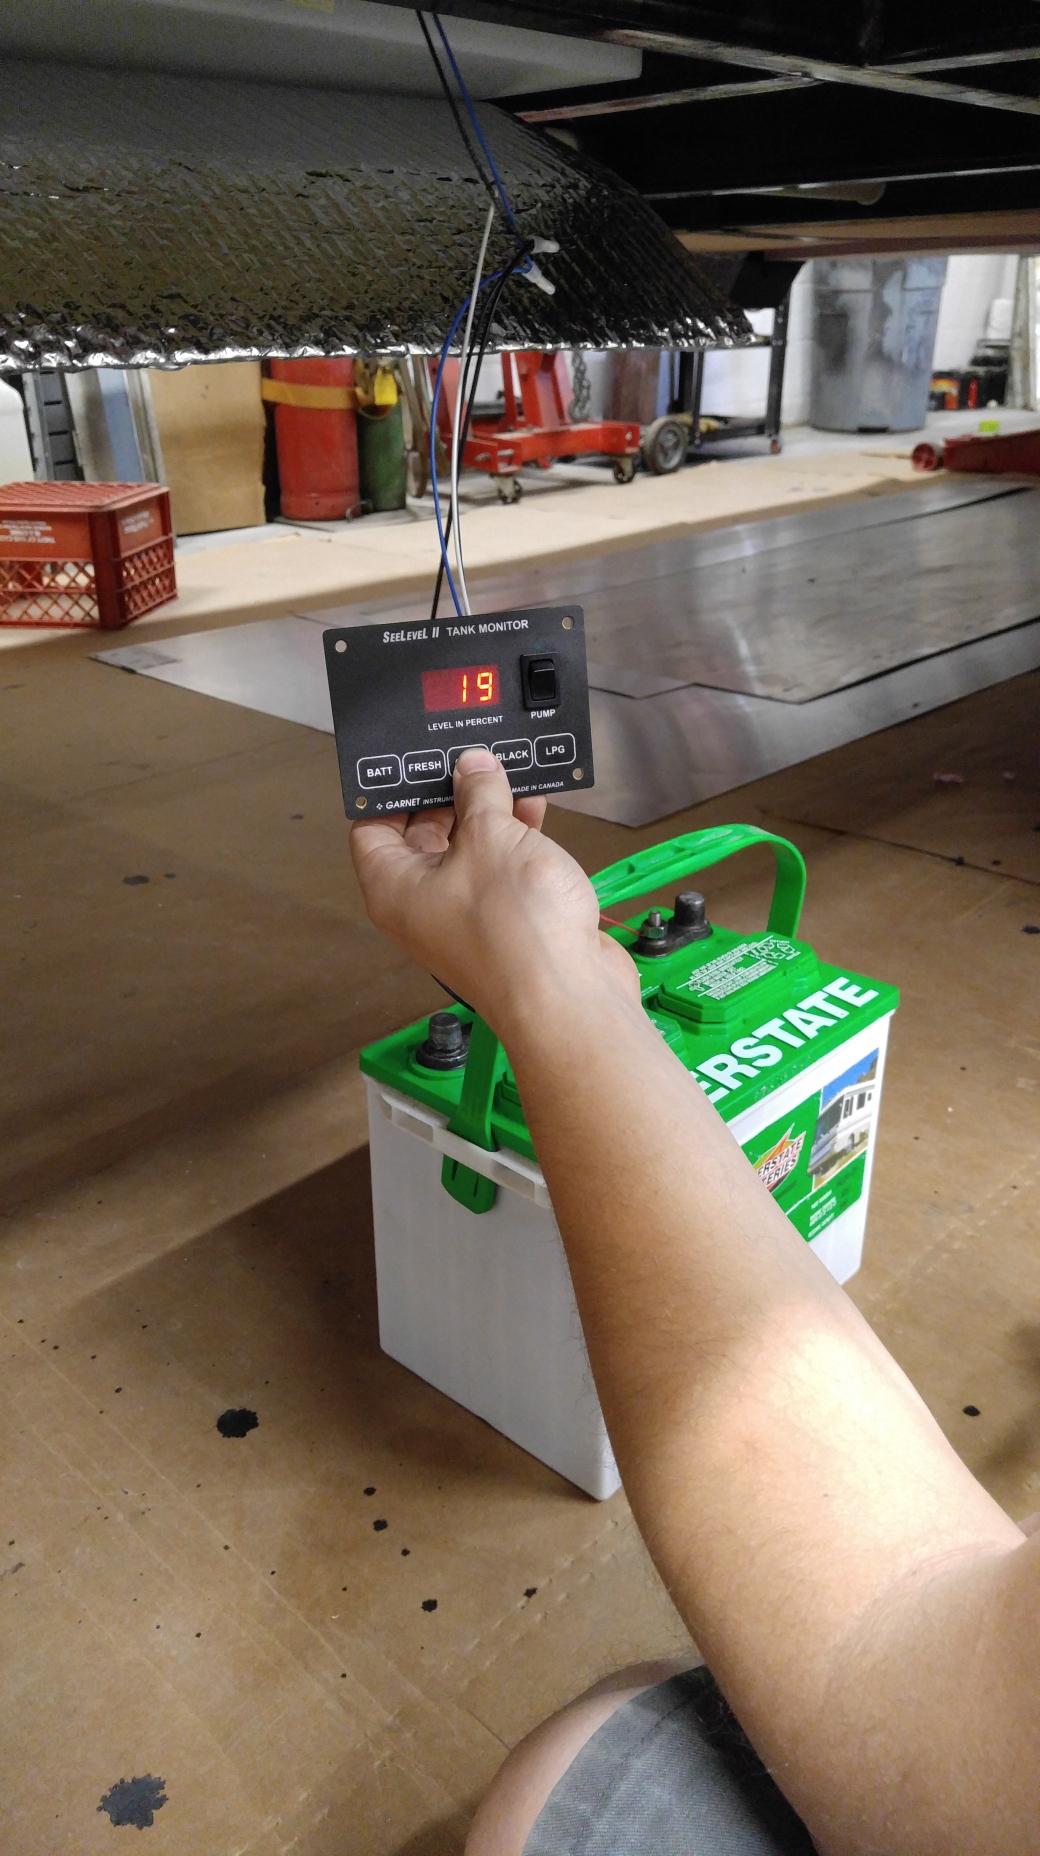
— installed strapping for our plumbing, put the tank monitors on, tested the plumbing for leaks (good news – none!), and got the belly pan pieces cut for the banana wraps. Spoiler alert: by far my least favorite part thus far was those damn tank monitors! They were INFURIATING! No matter how much water we put in the tanks the stupid monitors kept telling us the tanks were either 31% or 19% full. NO MATTER HOW MUCH WATER. Grr! I was losing my patience fast. But we finally got it to work right and all was right in the world again.
— were excited our Husky jack came in! We installed it and it looks & works great. Plus it was a big help because we needed to put Stella at an angle to get all that water we put in the tanks out! Perfect timing. And it has a remote :)
— officially finished with our gray tanks and worked on riveting up the strapping we fabricated! Originally we were just going to rivet the sides but we ended up riveting the bottom parts along the cross members and it really helped tighten everything up. Plus those corner pieces that help keep the plywood tight against the frame were one of my few brainy contributions to the project so I’m pretty proud of those. For the record – they work great. And now we’re ready to BELLY PAN!
— prepped the belly pan for install! Basically this involved cutting out the space where the belly pan would be in the way of the wheel well plates.
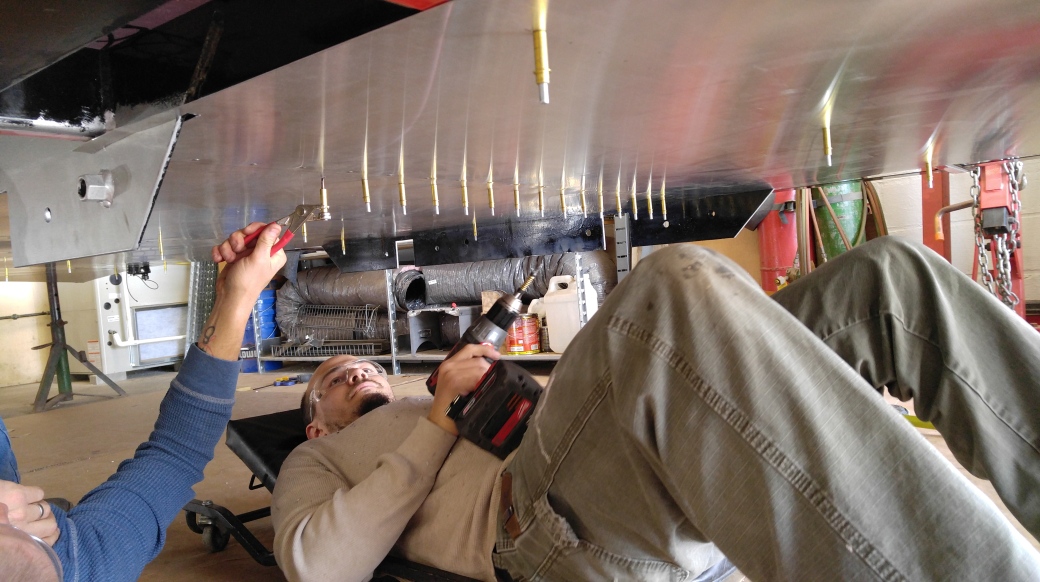
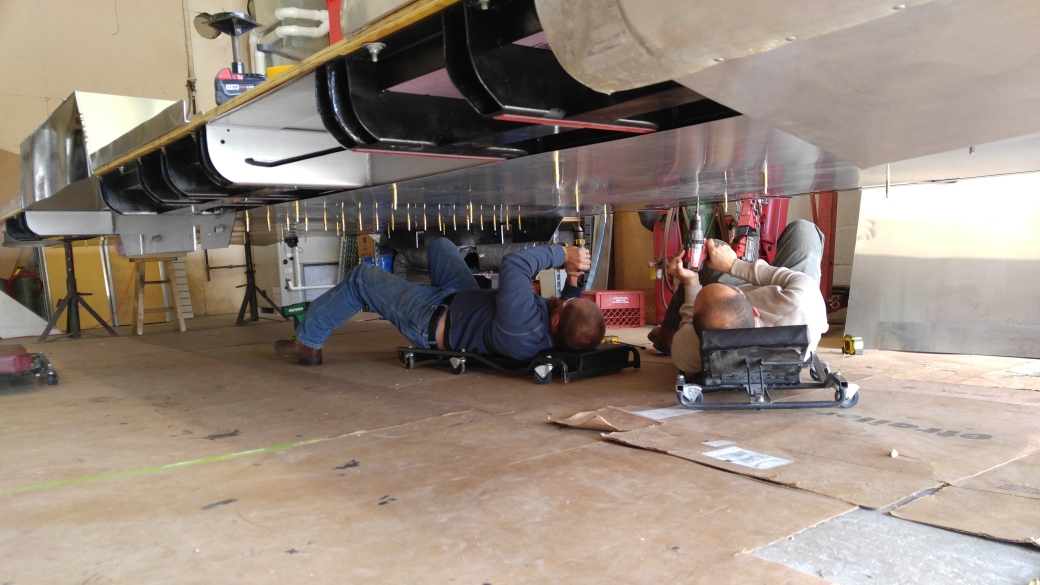
— PUT THE BELLY PAN ON!!!!!!!! Honestly this went up SO FAST in relation to what I was expecting. Plus I thought the fact that they were working from underneath would make it take longer but wham bam thank you ma’am 2 hours later it was up! And it looks SO AWESOME. The boys did great. We had seen on Instagram folks that had used jack stands and 2x4s to help hold up the belly pan but we had exhausted all our jack stands so the boys were just going to wing it… which was when I came up with my second brainy idea — why not clamp a piece of wood to the frame!? It worked great. Totally taking credit for that too. Plus when we got further down the frame we were able to use a stool with some foam on it to help hold the belly pan up closer when we couldn’t get clamps in. The boys also used our stick with predrilled holes that we used to rivet the belly pan pieces together to help space out the rivets when we were riveting everything together underneath. The boys had to drill out a LOT OF HOLES for the rivets and had dead arms and metal shaving beards by the end up the belly pan install but they did such an awesome job. It’s as tight as it can be and it looks amazing!
And that was April! We haven’t totally finished the belly pan — we have the trunk area to put on but we need to cut another piece of aluminum so we can do that part. Plus we have to rivet on the banana wrap pieces we made now that the belly pan is on. And the rear curved/angled pieces are next on the agenda after those things. But its a huge forward step and we are *that* much closer to putting the body back on the frame!!!
Full disclosure: we are not basketball fans. But March was a crazy month! So it fits. ;) Also, I apologize for being over a week late with March’s blog post .. we have had some family issues to attend to at home (read-our dog got neutered and his cone of shame is ruining our lives) which has made for a so-far slow April and a late post on the blog. Sorry about that! But here I am, 10 days late and a lot of dollars short, ready to update you on March!!
IN MARCH WE:
— cut the ACX plywood we bought for the subfloor to the curve and size we need! However after comparing our cut plywood to the ply from the original frame and double-checking the width of the body, plus conferring wth our most valued resources, we chose to trim a quarter inch of subfloor off from each side; we’re hoping we made the right amount of adjustments. Thank goodness for the Airstream forums & Colin Hyde! He’s a really great guy and we are forever grateful for his kindness in helping along the way when we hit a roadblock.
And as a side note: Probably one of the most frustrating parts of re-doing (restoring? renovating? I don’t know the right word) a vintage Airstream is there are no blueprints; there are no definite specs to go off of. Sure we can compare to what we started with, but when it’s all rotten and falling apart we end up guessing and crossing our fingers more than we like…… but that’s the fun, right?! It just can get really stressful and lead to many a sleepless nights for Case trying to make sure we are doing this right the first time. But even with the stresses, we loooove it.
— I went out of town with my sister for a weekend but while I was gone the boys put down a 2-part epoxy on the subfloor to seal it and hopefully prevent any kind of rot in the future! Also our gray tanks came in from Vintage Trailer Supply and they’re exactly as Casey had planned in his head.
— after the epoxy we laid the subfloor down on the frame, spent forever lining it up perfectly so the body wouldn’t be crooked once we got it back on, and started marking our drill holes. Casey even started DRILLING some holes! WHA! Our friend Jeff fabricated one of our wheel wells and it looks perfect! It’s crazy how much different a little plywood makes the frame look. It’s like we took 100 steps forward in a weekend.
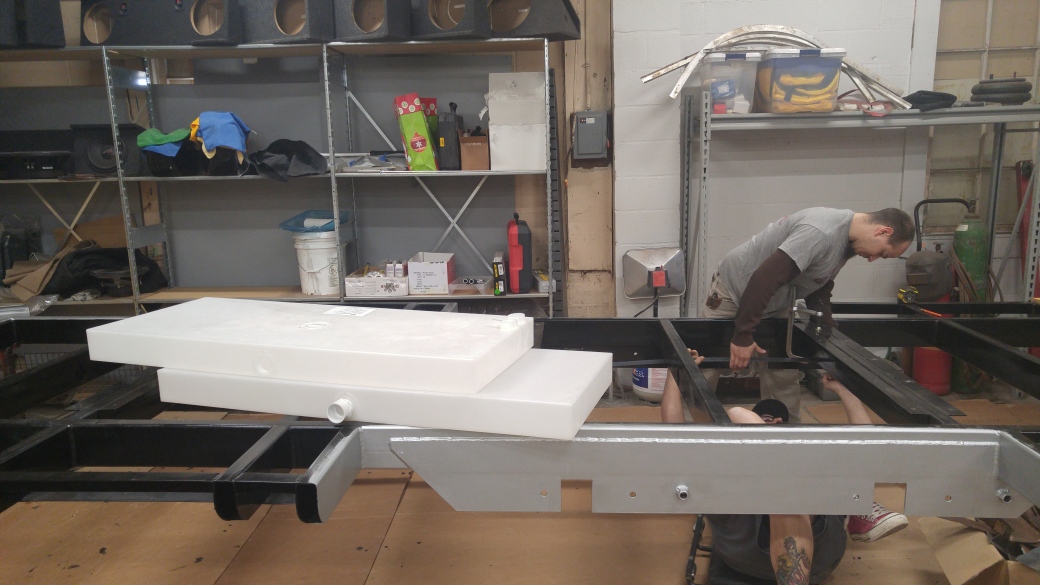
— our second wheel well is finished, more holes are drilled (including the ones for the curved c-channels!!), a couple screws are in, and we started working on the strapping we are installing to help hold the gray tanks up. We used 2.5 inch steel sheeting painted with POR-15. 2 straps for each gray tank plus corner pieces to help keep the corners stable. We are insulating the gray tanks with reflectix and styrofoam insulation, plus we have a thin piece of plywood underneath the tanks to help keep everything secure.
Another side note: originally we had planned to flip the frame once we got to this part so that it would be ‘easier’ to put the tanks in, plumb, and attach the belly pan … but we have since opted to not flip the frame this time. There are pros and cons to both, but for our situation this time around we chose to leave everything as-is. We just don’t have the right set-up to take down the gantrys from around the body, reassemble the gantrys over the frame to flip, then re-take the gantrys down to reassemble them over the body. It just all sounded like too much of a gamble and ultimately we were more comfortable not putting our body in jeopardy like that.
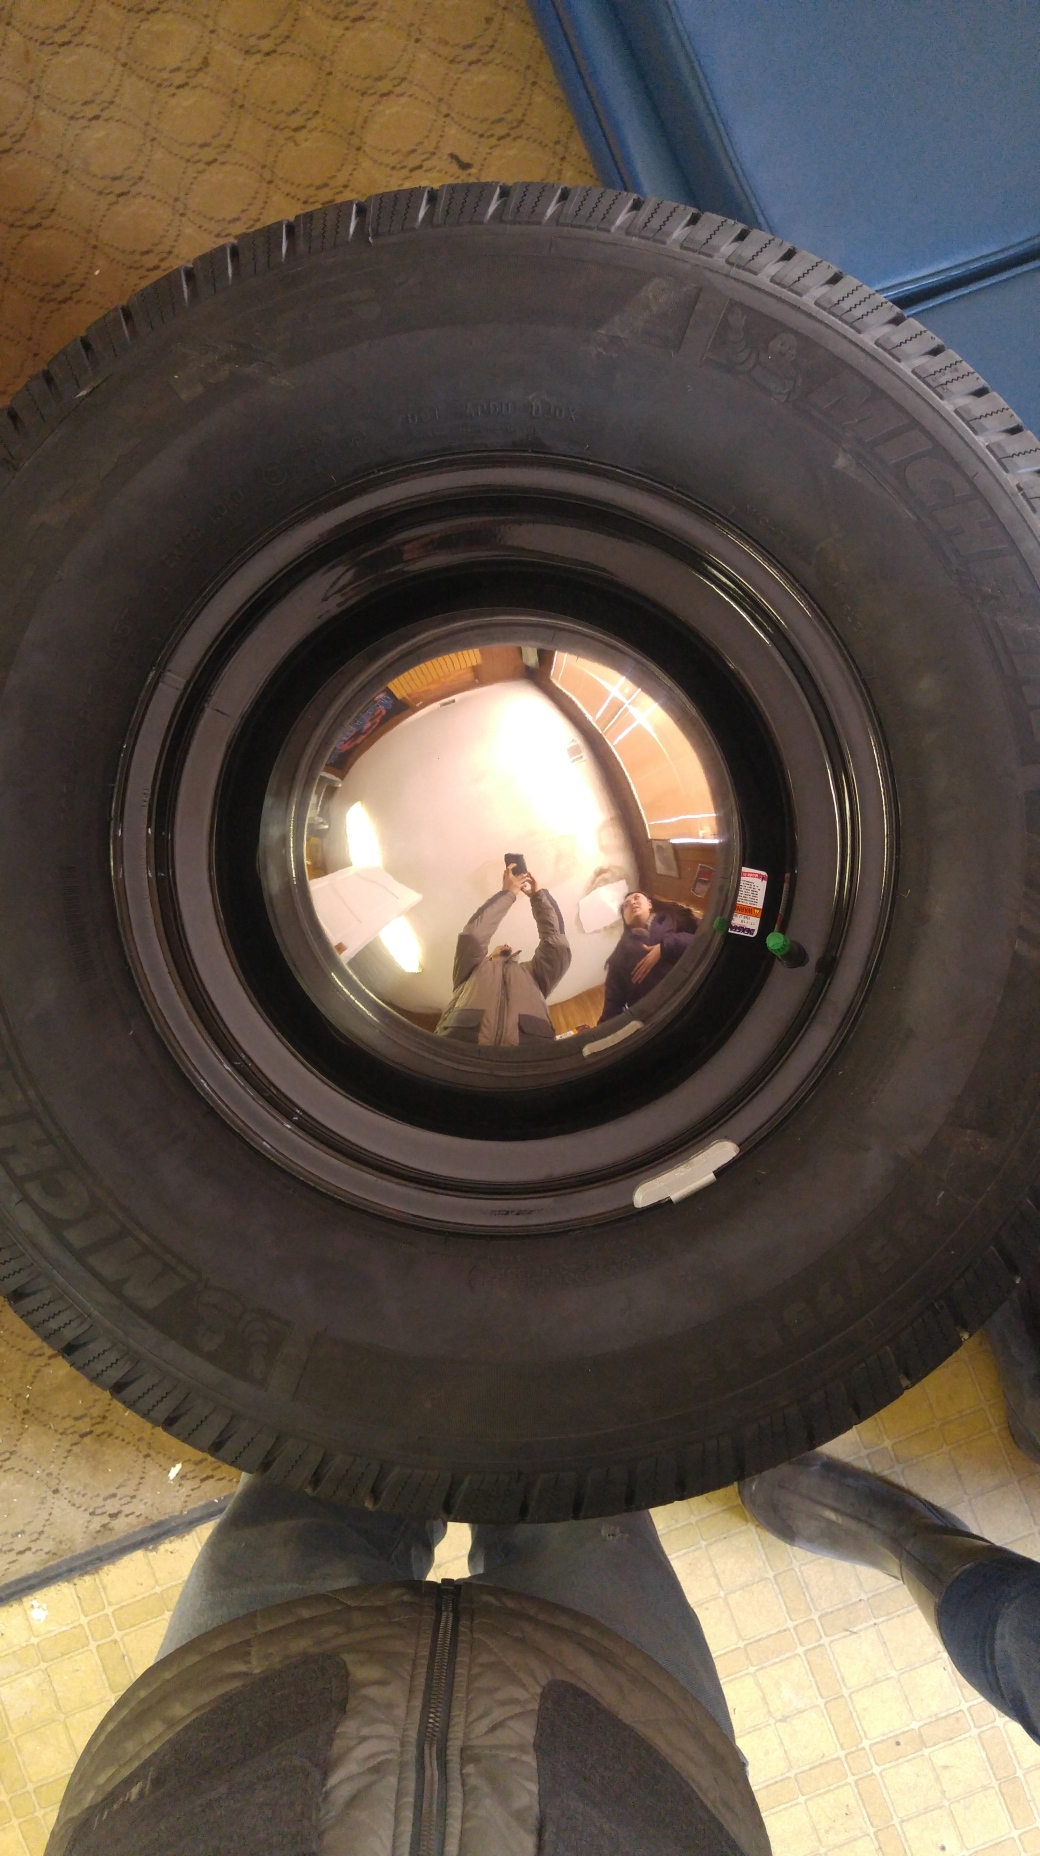
— built a spare tire carrier for underneath the front piece of subfloor. Once we had gotten the subfloor laid down on the frame and were walking on it, I found myself uncomfortable with the lack of support underneath the front piece of subfloor. Casey said originally that space was reserved for a spare tire but we had – up ’til that point – decided we would just throw the spare tire in our truck and not put anything down there for ease. But that piece of subfloor gave beneath our weight unlike the other pieces of subfloor and it SCARED me no matter how much Casey tried to convince me it wouldn’t ever endure too much weight. But my logic was, if we were working on doing everything else right the first time, why skimp on that? Casey again contacted Colin Hyde and he said that he spent a few years lugging the spare tire around in his truck like we had planned to do, but then it became too much of a hassle.. He ended up putting a spare tire carrier on his airstream, and that that spare tire carrier also helped firm up the floor. So it was settled; two birds – one stone. A spare tire carrier under the front piece of subfloor would remove the give when walked on AND give us somewheres to store our spare tire. Win-Win. Oh ya, and our wheels/hubcaps came in so we took those bad boys up to Costco to be mounted on our tires and OOOO DANG they look good!
— we started cutting aluminum to cover the spaces where the spare tire carrier and the step will be since those areas won’t have the belly pan up against the frame. We also discovered the spare tire carrier we had originally planned to use caused the tire to hang too low to the ground so we ordered one from a different type of vehicle; one that holds the tire closer to the frame.
— we started drilling holes and screwing in screws!! HUGE STEP! Our wheel wells are screwed into place, biscuits are in action, and the subfloor is becoming permanent!!!!!! YAY!! Also, Casey went to the HVAC shop where he used to work to bend up some aluminum for our c-channels. They look so new and fancy!
— our new spare tire carrier arrived and it works as perfectly as we’d hoped.
— we ended the month by finishing up with bolting the subfloor down, putting down all the c-channels, and working on test fitting our gray tanks. We also got the insulation we needed for the bottom of the frame but didn’t get to putting it in yet. After a very professionally counted tally, we average about 169 bolts to hold our subfloor down. (!!!) It felt like it took forever to get the whole thing bolted down because we kept running out of supplies! But dang it looks good, feels nice & solid, and that means we are SO SO close to belly-pan time!
We got a lot done in March. It wasn’t as much as we’d guesstimated we’d get done this month, but that’s okay; we are still very much on schedule. Here’s hoping we get to the belly pan sooner than later!!!
February has practically come to a close and we were as busy as ever! This recap is going to be jam-packed! I didn’t even realize we had come so far until I started finding pictures to post. So exciting! Let’s recap our month!
This month we:
— prepped the bumper to be re-attached, welded the step outriggers on, and welded angle iron between the outriggers for additional places to bolt our c-channel to.
— purchased plywood for our subfloor, discovered we must be doing something right because our curved c-channels fit the new frame perrrrrfectly, and we ‘banged’ out the dents in our banana wraps from our old belly pan (the only part we are reusing).
— celebrated because OUR AXLES ARRIVED!!!!!!!!!!!!!!!! Which means we were finally able to weld the axle plate to our frame, which in turn means we were able to attach the last of our outriggers as well! Thanks Colin Hyde!
— we cleaned up the bumper and cut up our old frame because we are officially DONE with it! Yay! It was bittersweet chopping it into bits, but we are excited for what peace of mind our new frame is going to give us.
— we dry fit the axles into the newly attached plate on our frame, attached the bumper, finished up some welds on the underneath of the frame, and drilled the holes for eventually bolting the axles to the axle plate.
— we drilled the holes in the axle plate for the shocks, cut and attached angle iron that will give us extra places to bolt our subfloor to the frame, drilled holes in the cross members for the plumbing, welded 3 inch pipe into the holes we cut, closed up the ends of the main frame rails so no moisture could ever end up inside, and lifted the frame up a couple feet so that painting would be easier.
— we attached the sashing that will eventually be the ‘meeting point’ between the belly pan and the body, welded on the plate for the steps, drilled holes for the tow chains, we degreased our frame, used metal prep to prepare our frame for POR-15, used salamander heaters to warm our frame up (and wondered why we hadn’t been using them to heat our workspace up until this point?!) and we turned our frame into a black (& silver) beauty!
And that’s where we are at! I haven’t taken a full picture of our frame with all the silver we painted on yet.. but we painted the tongue, the bumper and rear area, the axle plates on each side, and between the two step outriggers. Any places that won’t be covered by the body got the silver treatment. Now she looks like she just rolled off a factory floor and we can’t believe that 2 months ago she was a dream & a pile of steel. We also can’t believe how neat this time-lapse video we made with our gopro of us painting came out ;) I literally cannot stop watching it!
We didn’t get as far as we had hoped this month; we didn’t get the c-channels or plywood down. But the epoxy for the plywood comes Monday so hopefully we will get to that step sooner than later. We’ve got tires purchased, gray tanks ordered, plywood ready to rock & roll once it’s received the royal treatment, and a team of strong men ready to flip the frame. March should be an exciting month! 157 days until our maiden voyage! #nopressurehoney
I’ve decided that I will be recapping our Airstream adventures at the end of every month for the next few months; we have a trip planned for Stella Stream at the beginning of August. We are road tripping to upstate New York for SpiedieFest (http://www.spiediefest.com) and to visit my extended family up north. We don’t have ambitious plans to have a fully complete Airstream by the time August rolls around, but we do have definite plans to have the frame finished, the body back on, the flooring in, and everything squared away to make her road ready – with an air mattress thrown inside for the time being. :) We have 7 months total to get our girl whipped into shape so I’m hoping that recapping each month will hold us accountable, keep us motivated, and keep our friends and family informed on our progress. So here’s our recap for January – our first full calendar month of working on Stella!
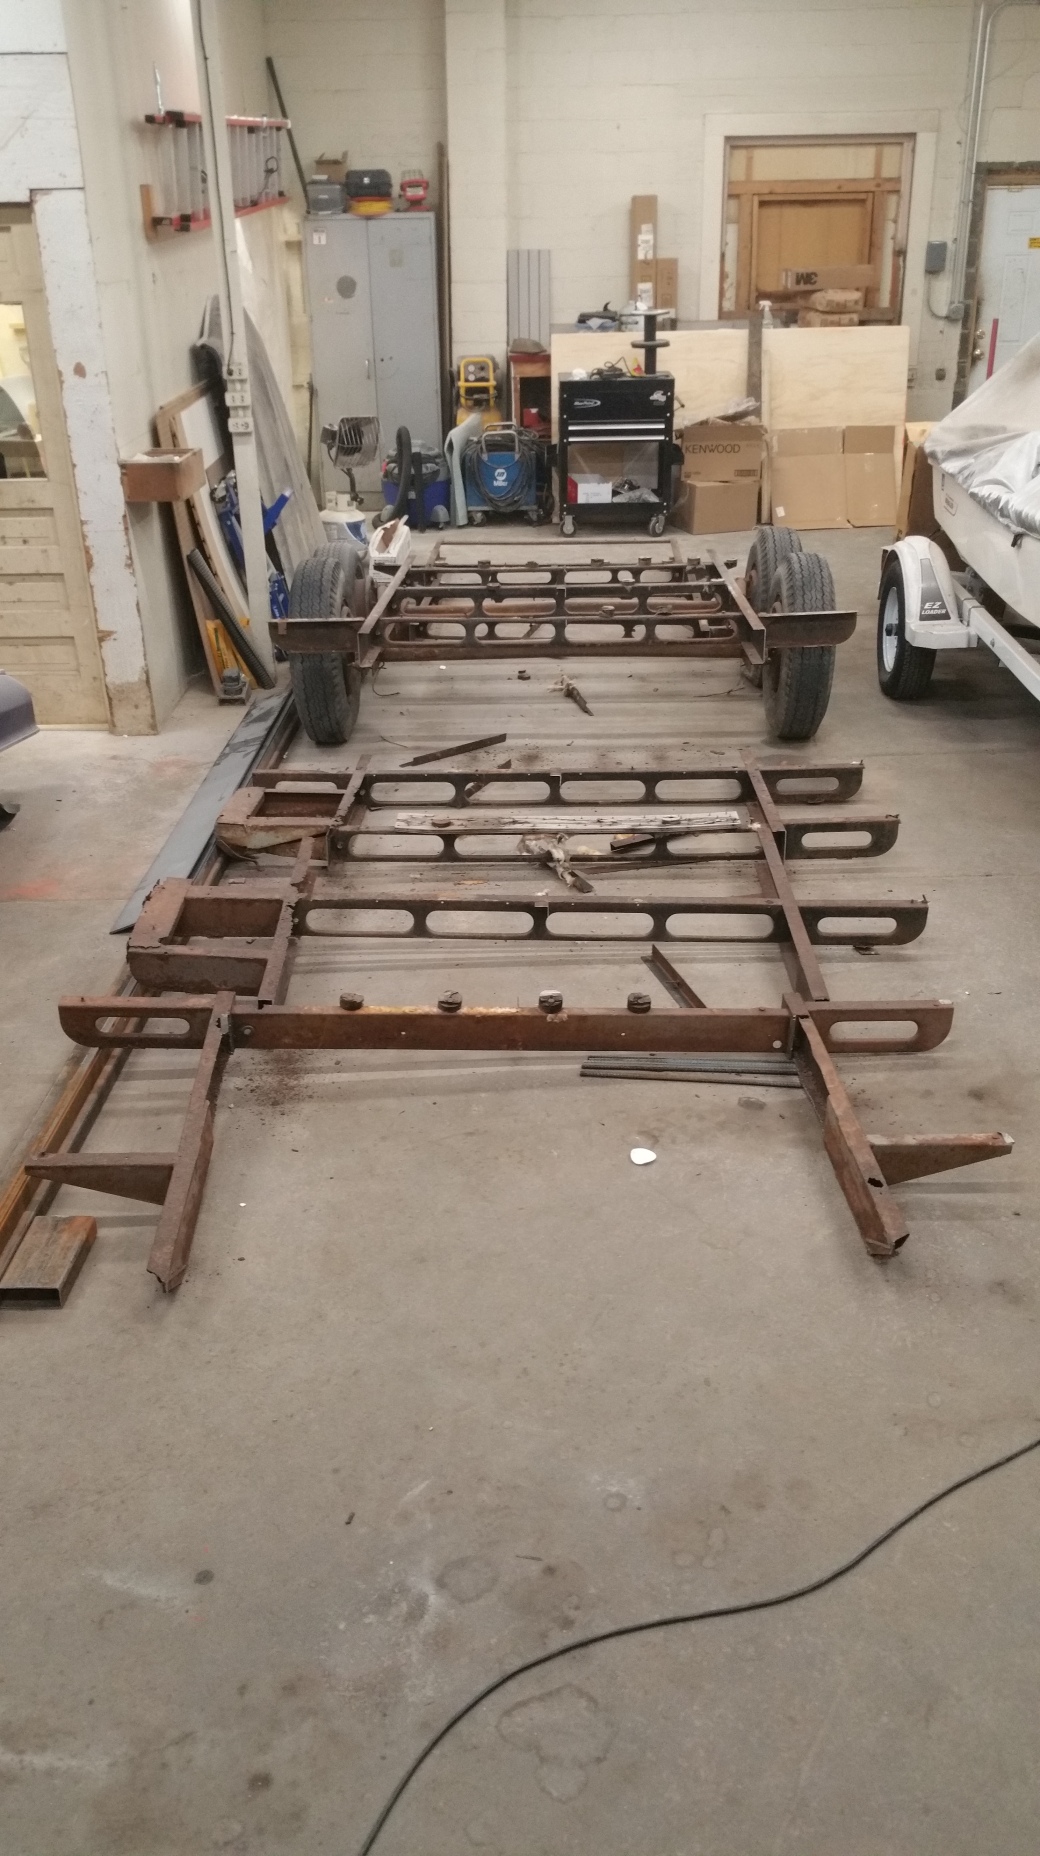
April 2015
It boggles my mind that the janky frame with new steel strapped to it pictured above has evolved into the picture below after putting in a months worth of work.
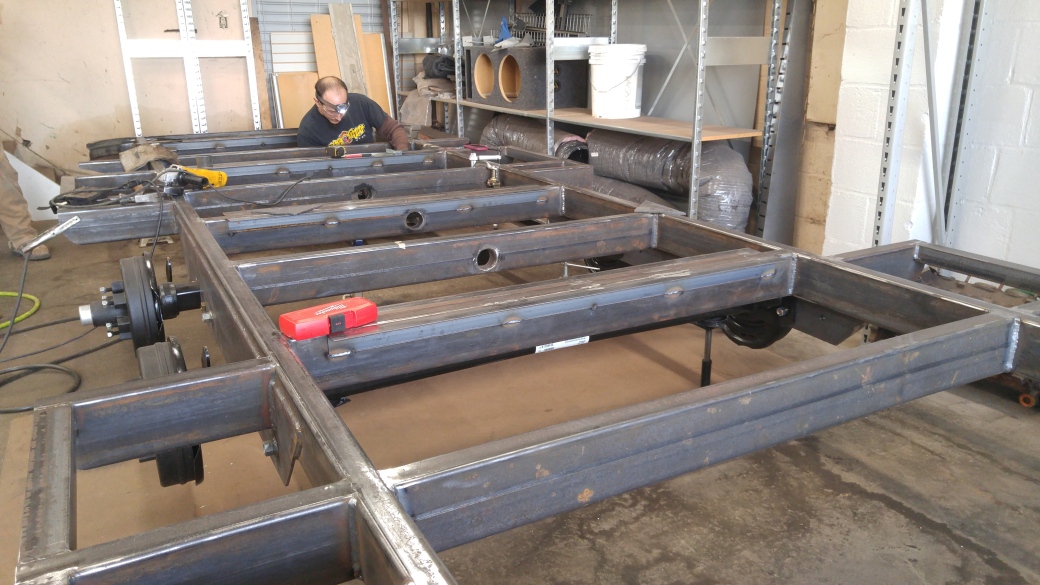
January 2016
We’ve totally rebuilt her – Stella’s got herself a brand new frame! You can’t see it, but the original frame sits just to the left of this picture. We reference the schematics of the old frame often when building the new one. It’s unbelievable to think that we are so close to being done with the old frame! It is so exciting knowing we are making progress. Right now we are waiting on axles – fingers and toes crossed they show up this week?! It’s been about 5 or 6 weeks since we ordered them so they should arrive any day now. Once the axles arrive, the last few outriggers that aren’t attached will go on (in accordance to where the axle plate will go) and we will no longer need to use the old frame as a template. I’ve been trying to think of a clever way to keep a part of the original frame as a little memento; a token of where we started. I haven’t come up with any great ideas yet.. lol.
Since our last post, we have:
Finished cutting & welded on all but 6 outriggers – we are waiting for the axles to arrive before we get to putting the last few on.
We put a new coupler on the front of our tongue.
We’ve removed the bumper from the original frame, filled the holes in the bumper created from the jack stands poorly affixed by previous owners with weld to make it one solid piece of metal again, and cleaned it up a bit. Fits perfect on our new frame, by the way. :)
The frame has been ground of almost all surface rust and is ready for painting once axles arrive and are installed.
We’ve made the step outriggers and tack welded them on, but are waiting to weld the other two on until we get the steps – much like the outriggers by the axles.
We’ve put extra supports between our outriggers so we have extra surface to bolt our c-channels to.
We saved the curvature pieces from the original belly pan and bonus – it fits perfectly against our new frame!
We made the axle plate, though we are unsure if we will have to re-make it or not yet.. will have to wait and see how they work.
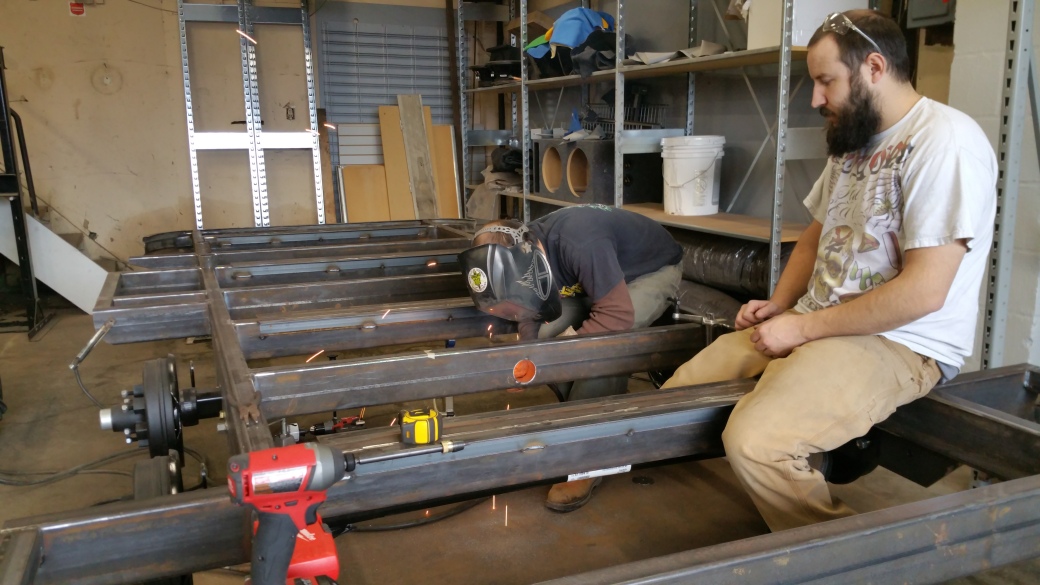
Obviously the ‘we’ I speak of is Casey and whoever is down to help. I help of course but find myself more in the way since I am not well versed in welding, or cutting metal, or much anything that we have been doing thus far lol. I have been of minimal [albeit important] help; I specialize in cleaning up the frame with the grinder, cutting outriggers to size with the stationary bandsaw, ample comic relief, some moral support, the occasional tool grab, cleaning the general work area, and most importantly — chief of documentation. (I am best at that last one.)
(This is me trying to take a picture of Casey welding while wearing a black-out mask. Obviously it didn’t work because I couldn’t see. But I look nice in the helmet, right?!)
And extra exciting news – we’ve decided on a floor plan for our Airstream! This isn’t to spec quite yet and the finishes will be different when finished, but it is the general floor plan we will be working towards. SO exciting!
But most importantly, we’ve had a lot of fun along the way!!! It’s a lot of work but there is nobody else in the world I would want to build an Airstream with. #overalls
Our plan in February is to get those axles we keep harping about!!! ;) We will then get the axles put on, get the frame painted, put the plywood down, and get the c-channel bolted to the frame. And hopefully our end-of-month picture will look quite a bit different than the one above. Making progress, making memories, & making Stella.
It’s been 365 days since we impulsively decided to buy an airstream and drove down to Licking, MO to bring our girl home. Sometimes it is still unbelievable to us that we OWN an Airstream; it was something we only dreamed of and it became a reality in a matter of hours. I’m still asking people to pinch me! WE’VE OWNED AN AIRSTREAM FOR A YEAR!
Not a lot happened for Stella in the first year we owned her; 2015 was a busy one. My family moved across the country to practically become our neighbors, we had the most fun family wedding to attend, our very close friends remodeled a new shop that we helped with, and everyday life in between kind of put Stella on the back burner after we had her frame removed from the body. It was super exciting getting her gutted and the body lifted off, but once we got to that point we didn’t really have any place to build the new frame – and we thought we’d wait until summer to work on it. Well, summer turned to fall, fall turned to winter – and when winter came around we were fortunate enough to be given the opportunity to build our new frame in the back of the shop we had helped remodel earlier in the year! Which brings us to now. :) History proves that we do all of our best work in the winter anyways.
We are so thrilled to be able to work on building our frame inside – with heat! And a roof! It has been a dream. Building the frame has been going MUCH faster than anticipated. Once the frame was inside the shop, we wasted NO time getting right to work on rebuilding. We have been using the old frame as a template for our new frame. Originally we had planned to build the new frame on TOP of the old frame, but the back of the shop is plenty large enough for us to build the new frame next to it. Bonus!
Casey invested in a new cordless bandsaw (insert shameless Milwaukee plug here.. #pleasesponserus) that has been great. Cuts through that steel tube like butta! Plus its’ cute to boot. (Is that weird to say?)
The steel sat outside on the old frame behind our shop for a few months which has resulted in quite a bit of surface rust on the outside of the steel tube. My biggest contribution to helping with Stella has been grinding all of the build up off. It makes for some black boogers! TMI, I know.
Also, I have discovered I hate respirators. Necessary evil. But I love my overalls & yellow sweatshirt. I’m like an Airstream workin’ minion.
Once that surface rust has been ground off it looks good as new.
Look at the difference between the left steel tube that’s been grinded (ground? IDK.) to the right steel tube! Who knew steel could be so beautiful. :) Once the surface rust has been removed, it’s ready for welding!
FIRST WELD!..
..and just like that, the main part of our frame is done! I even got to weld a few of the cross members into place. The outriggers have been more time consuming just because you have to cut the curve into the ends and the bandsaw doesn’t like curved cuts quite as much as straight ones. We’ve been through a few blades. But Casey made a fancy template to use for keeping the curves on each outrigger consistent so it isn’t so bad. Somehow I don’t have a picture of it in action but I will get one soon.
Casey’s outrigger template!
We have been using a stationary band saw to cut our outriggers to size that has been super convenient too. We just set it and forget it!
Removing the tongue was crazy; the original frame was so shady that once the weight of the tongue was removed, the frame became extra bouncy! But great news, the tongue fits in the new frame extremely well.
We ground it clean and welded it to the frame. Now it’s really looking like a trailer!
The outriggers are tack welded on but man they go quick once they’re cut to size and spec. With every outrigger the frame looks more and more like an Airstream.
The 4 outriggers at the front & back are shaped differently so we cut them with our tiny band saw table. Works like a charm and they are identical to the ones on the old frame.
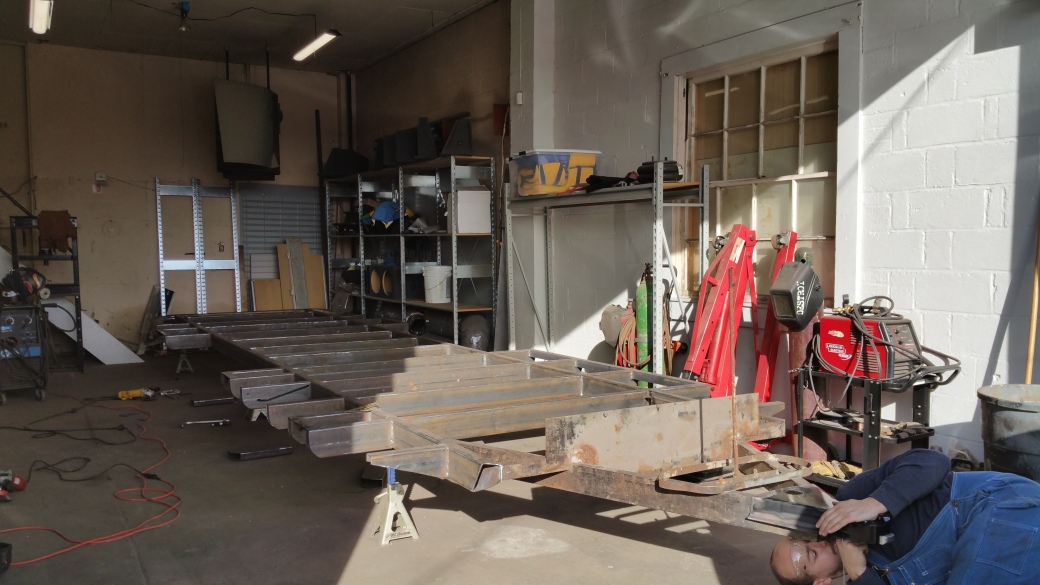
At this present moment this is about what we are working with. The original tongue is welded to the frame. We have 6 of 24 outriggers tacked on. Half the trailer has been ground of all surface rust. And it has been a day short of a month since we re-started working on our Airstream. I’d say that’s not too bad! Plus we already have some POR-15, tons of rivets, and brand new axles (#thankscollinhyde) ordered and en route over the next few weeks. Things are happening!
2016 is a big year for Stella. We have a deadline to meet.. 202 days from now we plan to be reassembled and have the interior roughly done so we can take Stella on her first camping trip in August. It’s ambitious but we are excited. Plus the deadline helps to motivate us. I expect we will be spending most ALL weekends and spare evenings down at the shop working on our ‘stream. And frankly, I wouldn’t have it any other way.